Getting Started With Monty Monitor

We're so excited to have you join our compost community and start using Monty Monitor. We know that getting set up with new tech can be tricky, so we've created this page to help guide you through the process. So, let's get started!

Step 1

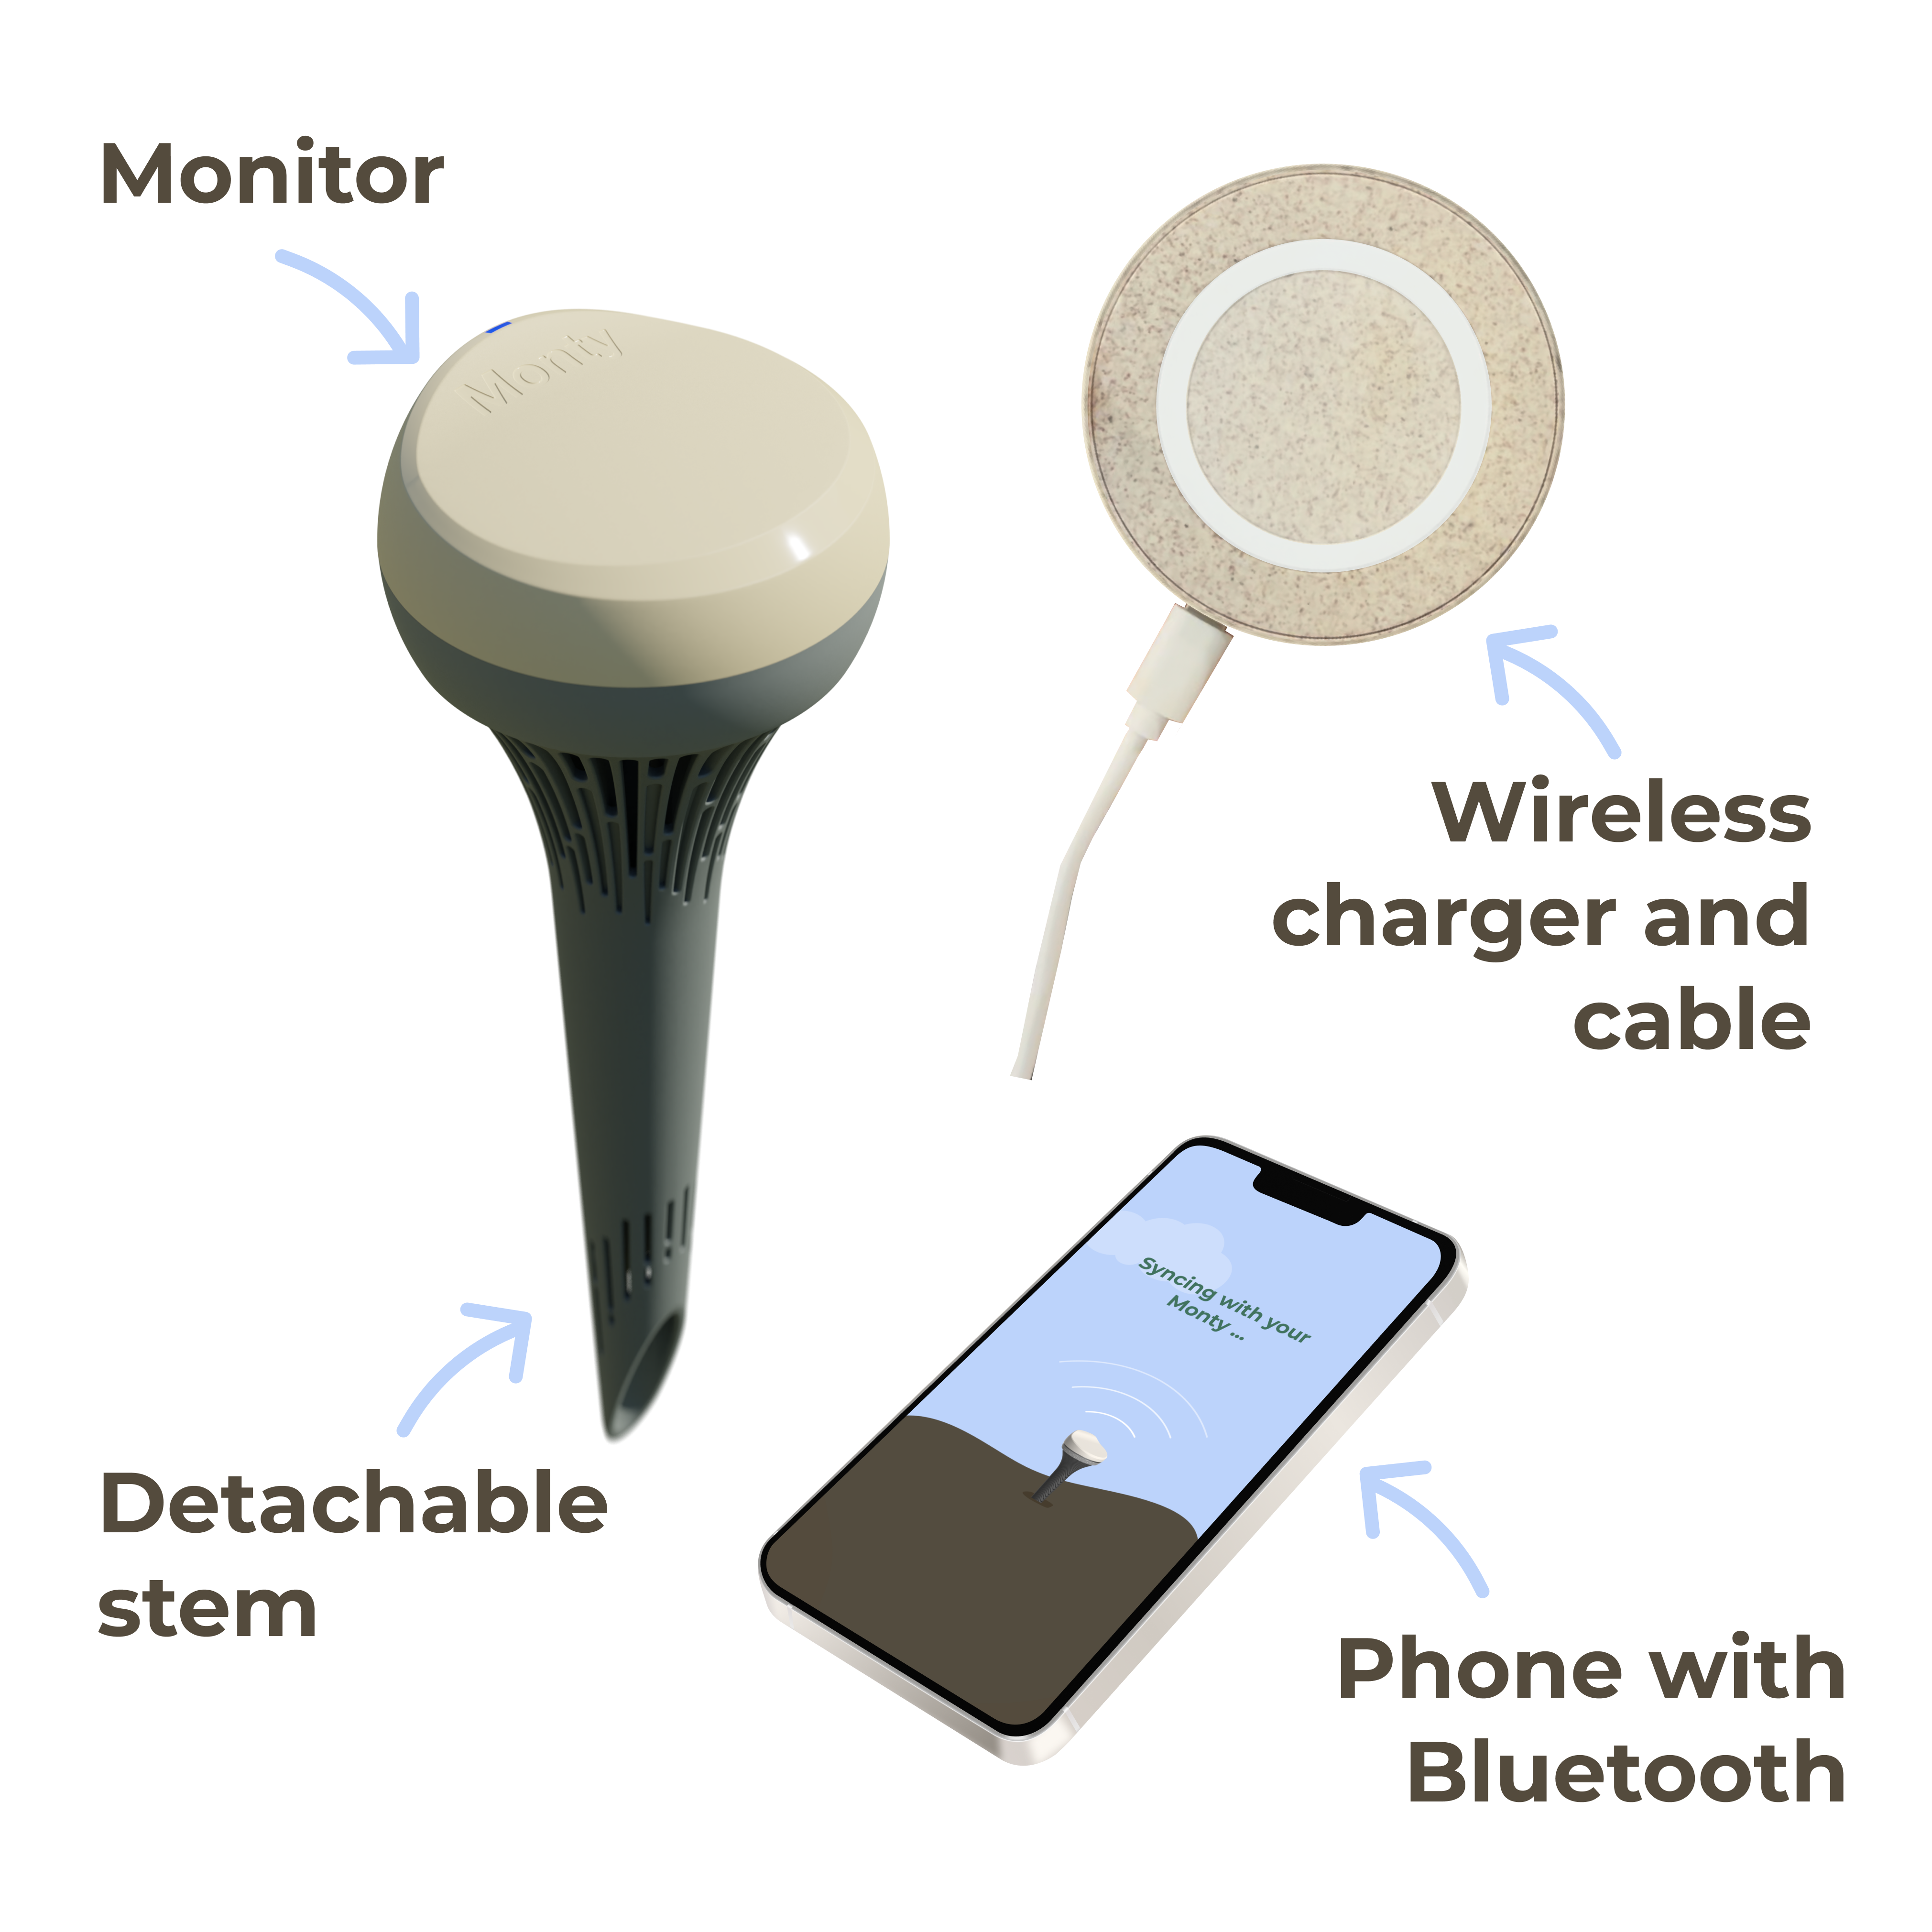
Make sure you have the following

✔ Monty Monitor

✔ Monty Monitor Charger 

✔ Phone with Bluetooth on

Step 2

Check if Monty Monitor is ready

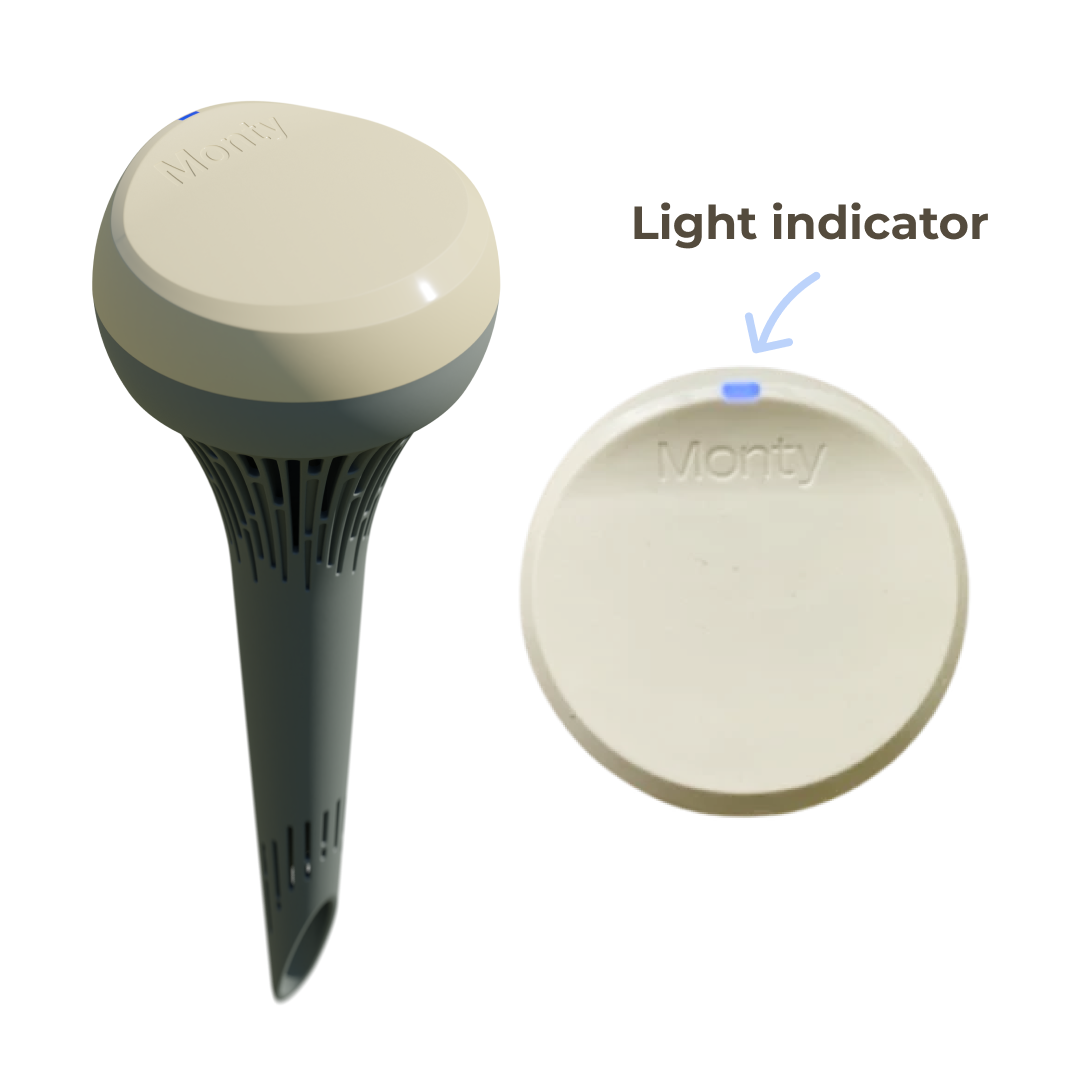
Monty Monitor should arrive to you charged and ready to go. Check Monty Monitor is ready by looking to see if the light indicator is flashing blue, this means it's ready to connect to your device. If you need to charge Monty Monitor, visit the charging guide below to learn more.

Step 3

Download the Monty Mobile app

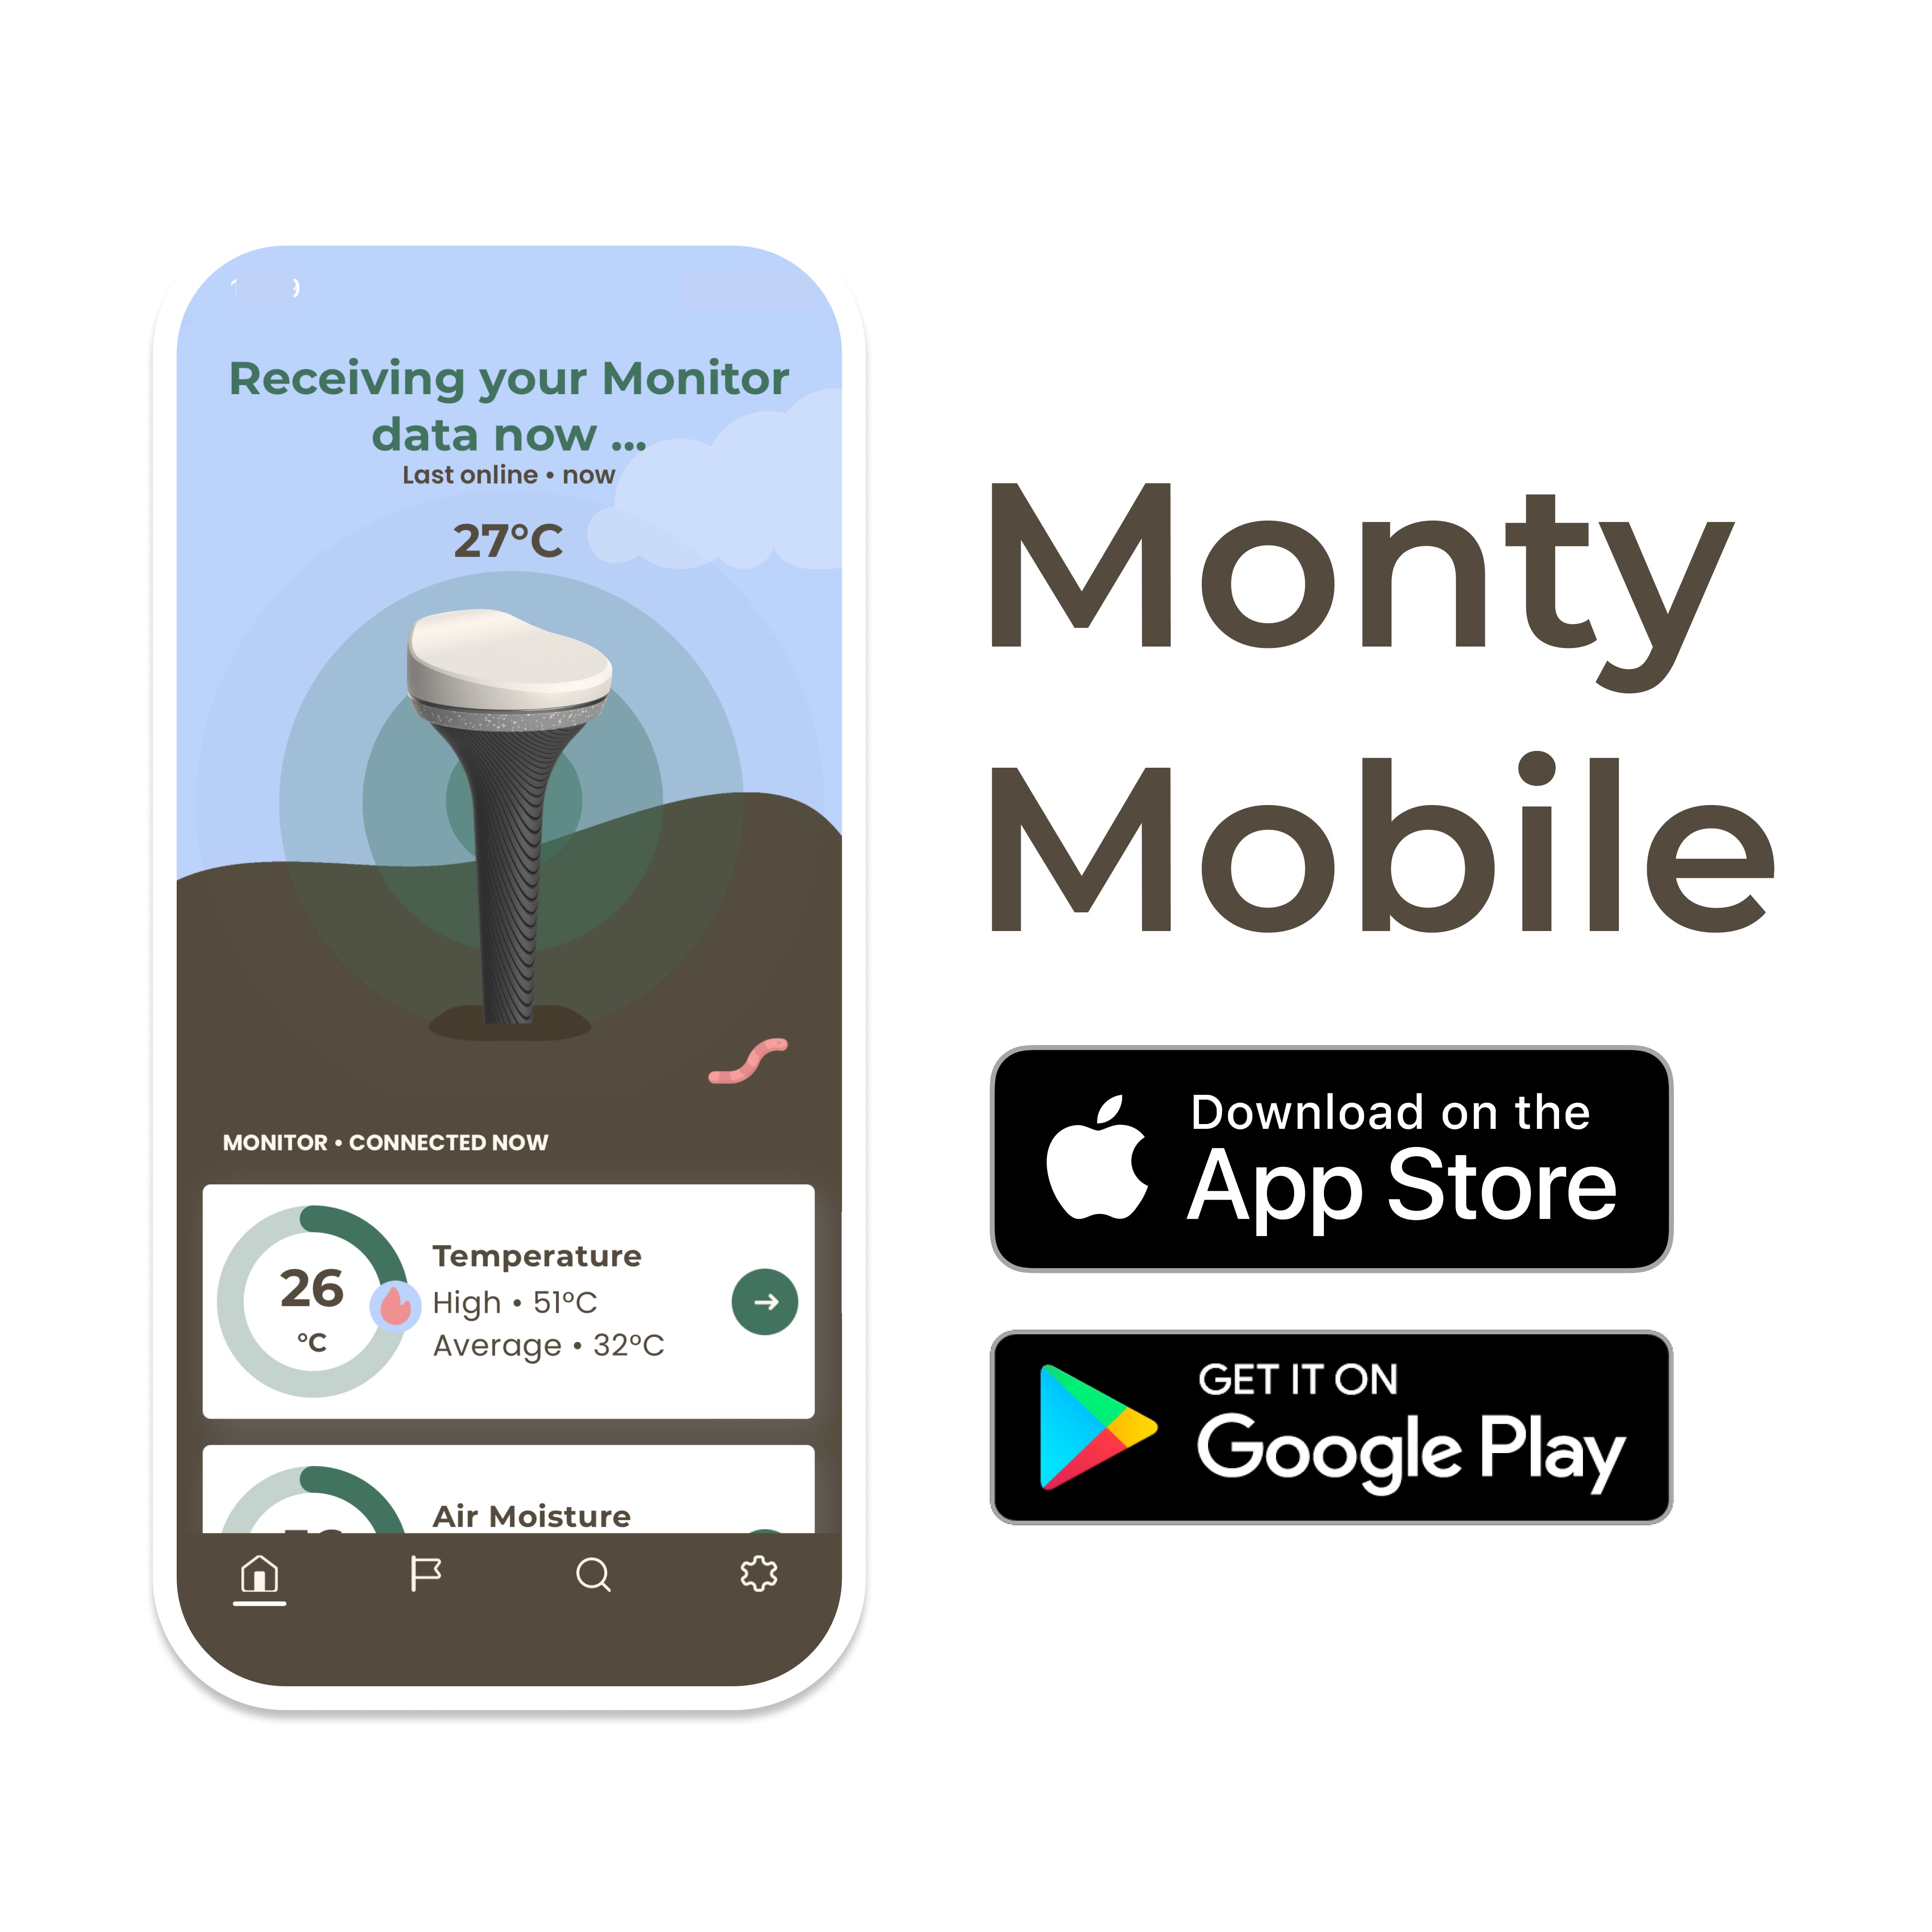
Monty Mobile connects you to Monty Monitor. Download it for free on your iPhone or Android device. To learn more about creating a Monty Mobile account, view the account creation guide below.

Step 4

Create a Monty Mobile account

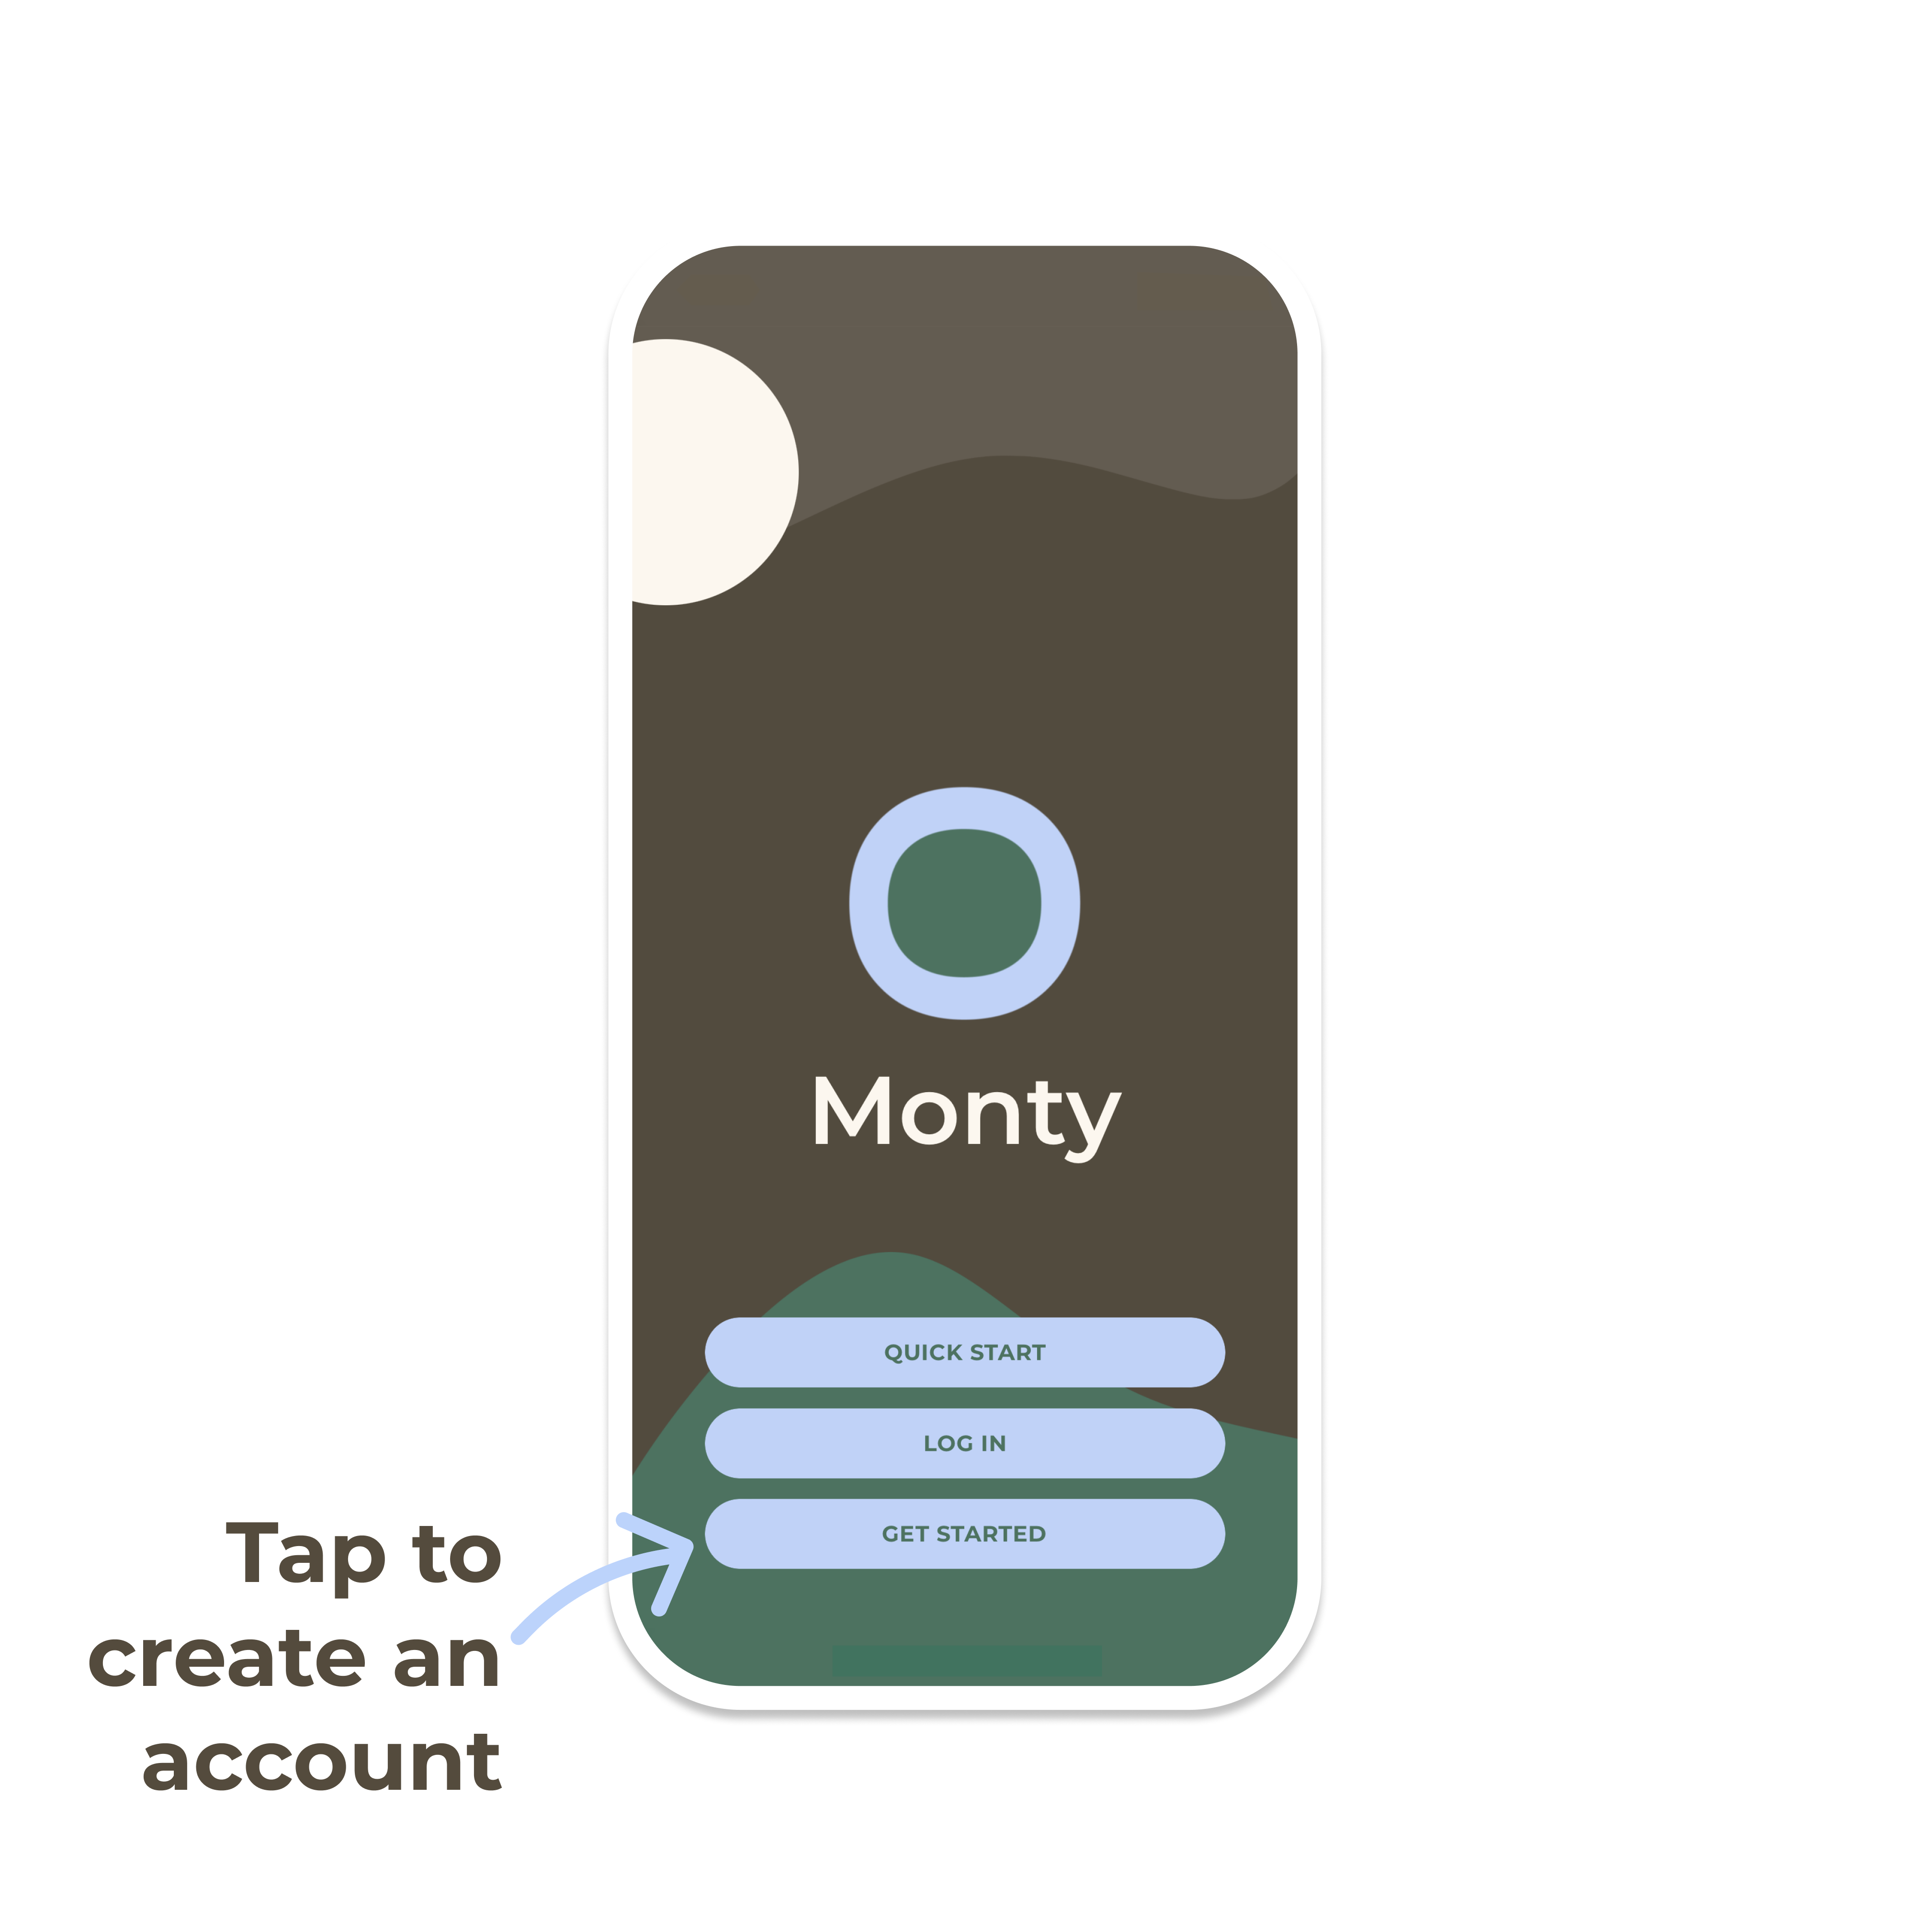
After downloading Monty Mobile on your iOS or Android device, tap Get Started to create your Monty Mobile account.

Step 5

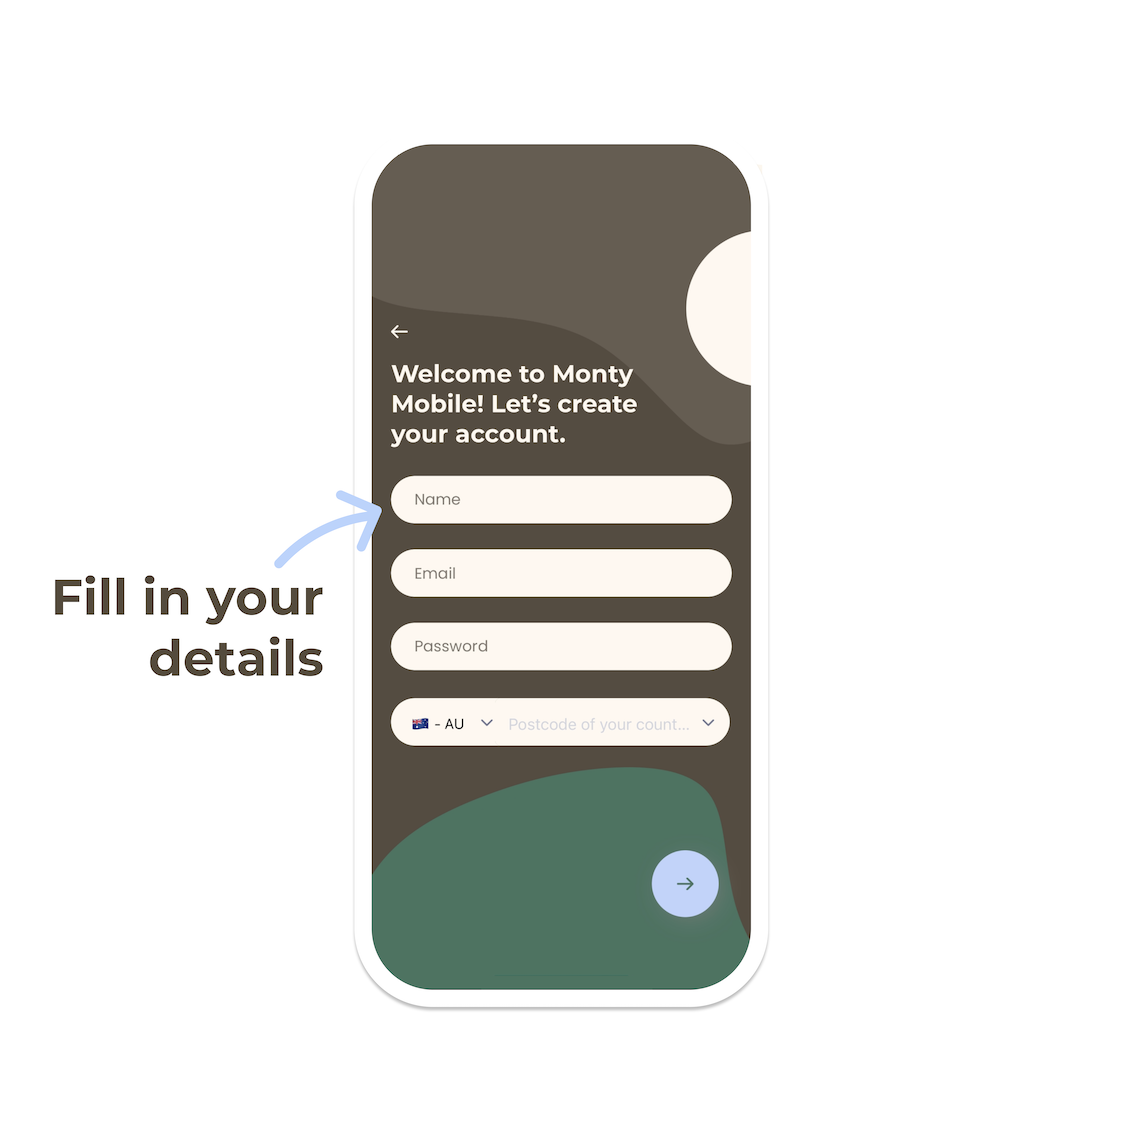
Create an account

Create your Monty Mobile account by filling in your name, email, password and postcode. Monty Mobile requires your postcode to provide you with your local weather data.

Step 6

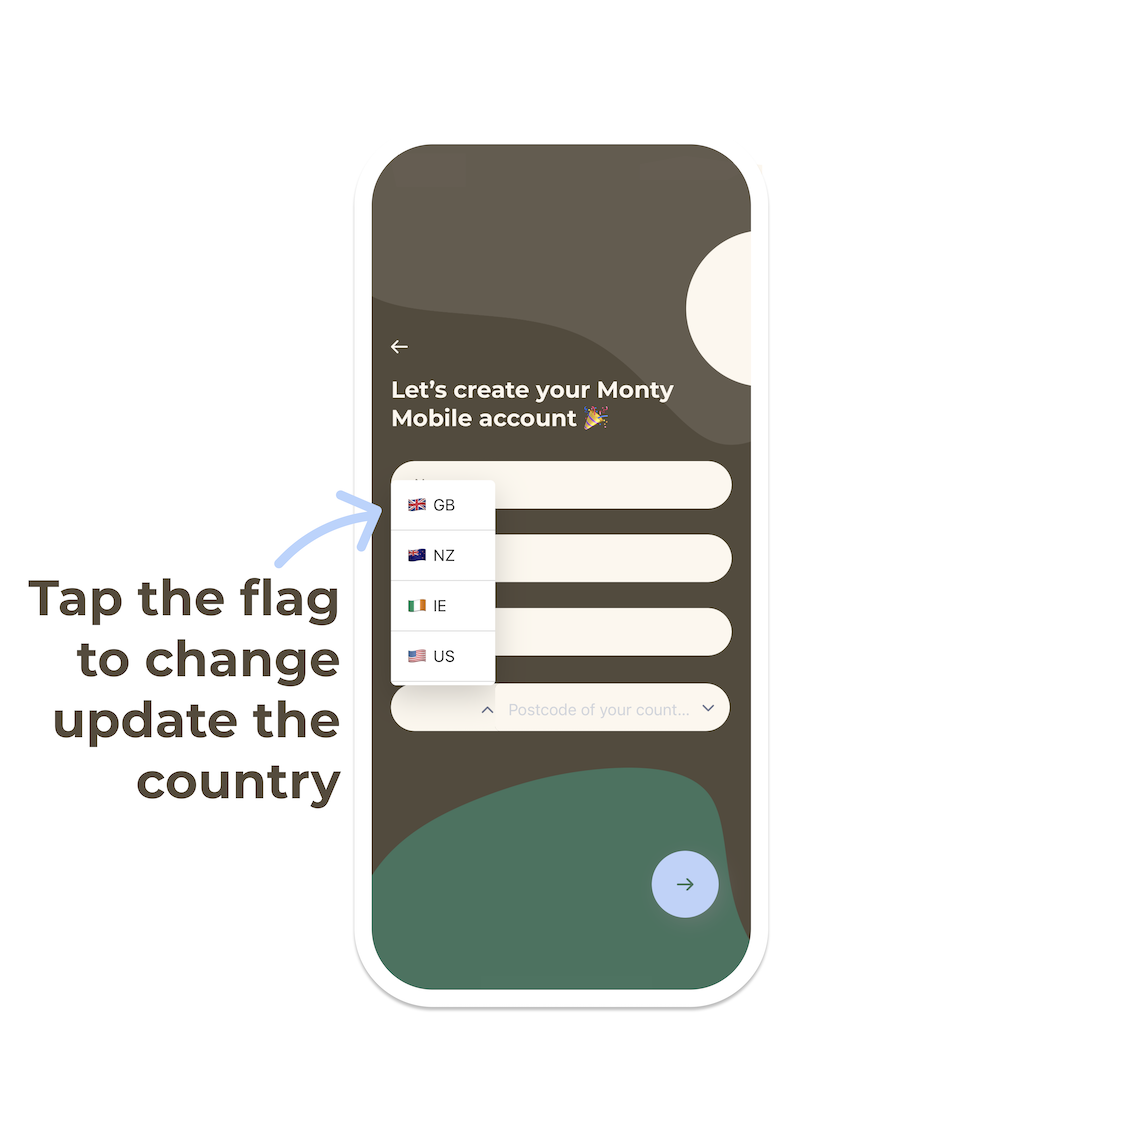
Select your country

If you're located outside of Australia, tap the flag icon and select your country. If for any reason your postcode is not listed, please contact us.

Step 7

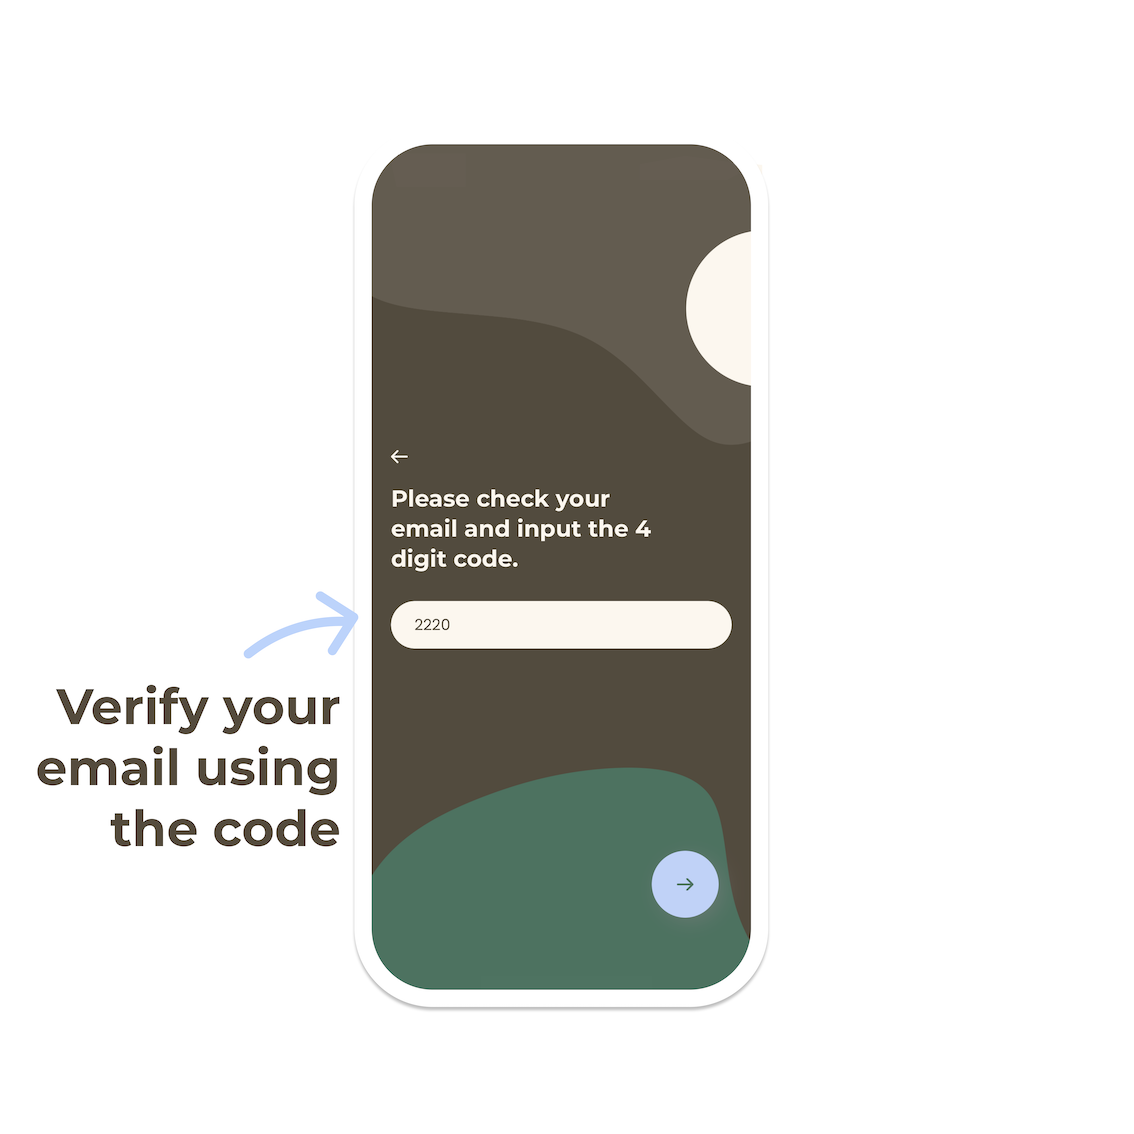
Verify your account

Verify your account using the 4 digit code that was sent to your email address.

Step 8

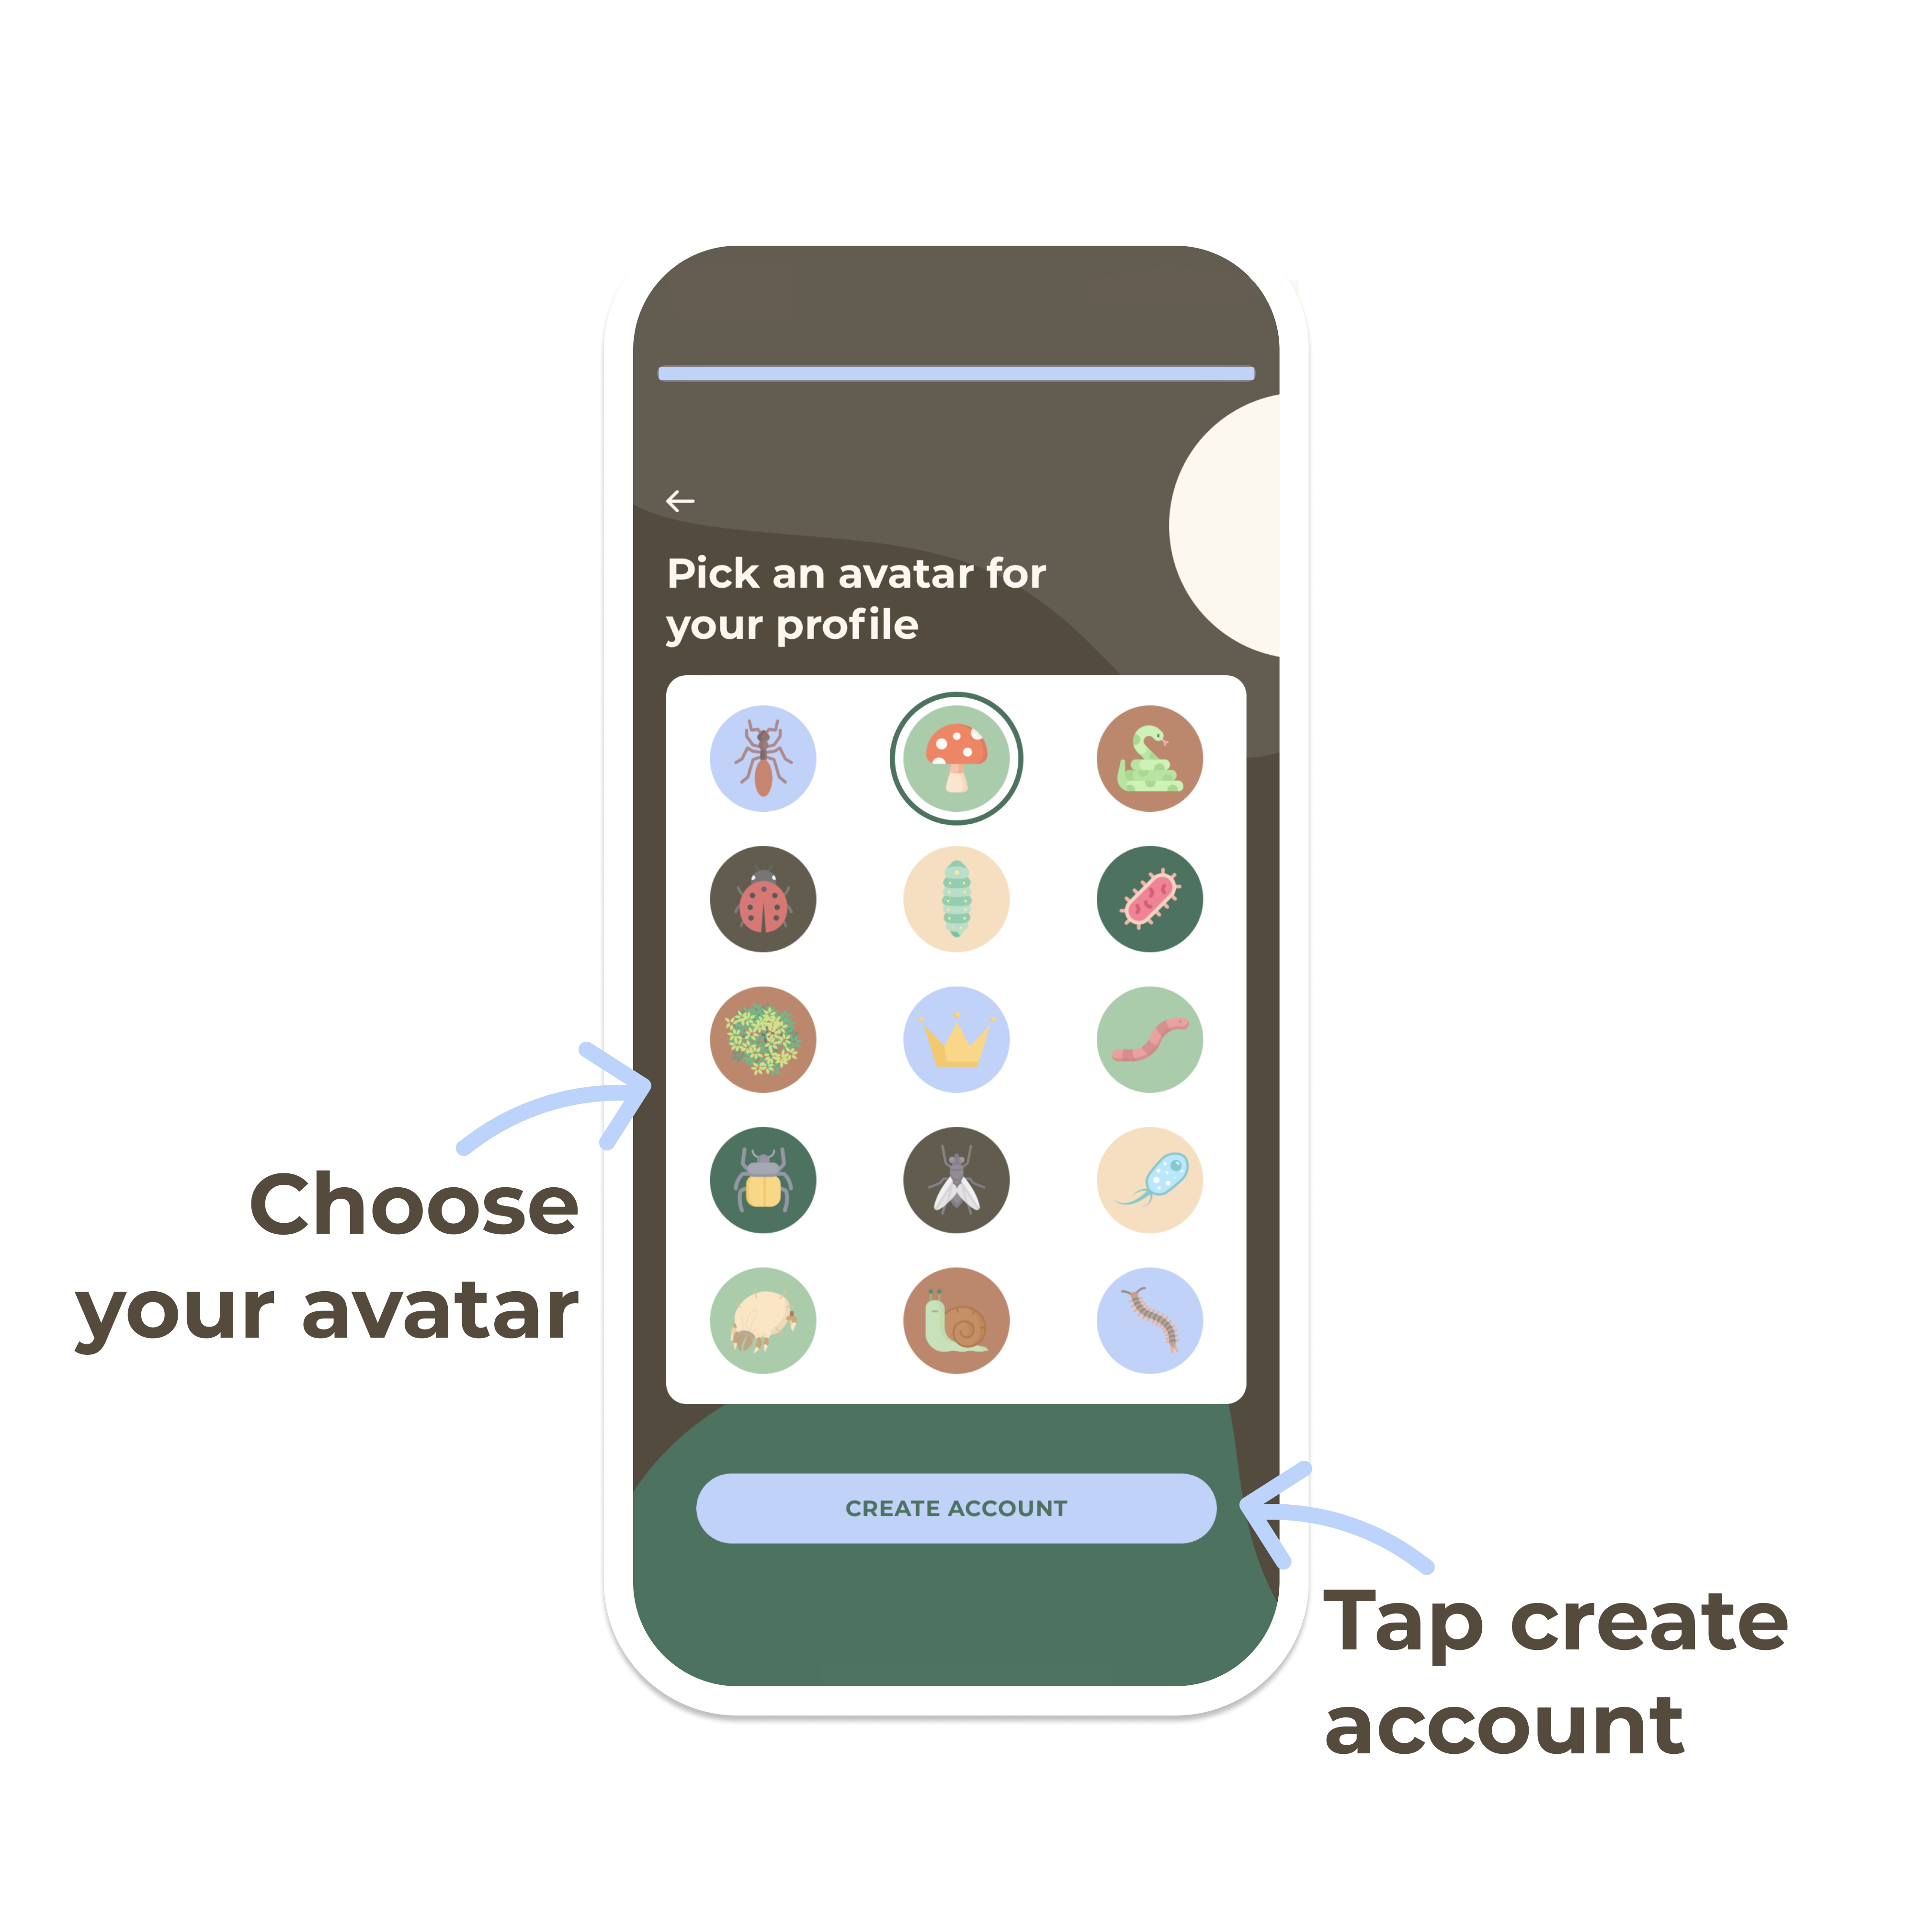
Complete account setup

Choose your avatar and tap create account to complete the account setup. Now Monty Mobile is ready to connect to Monty Monitor.

Step 9

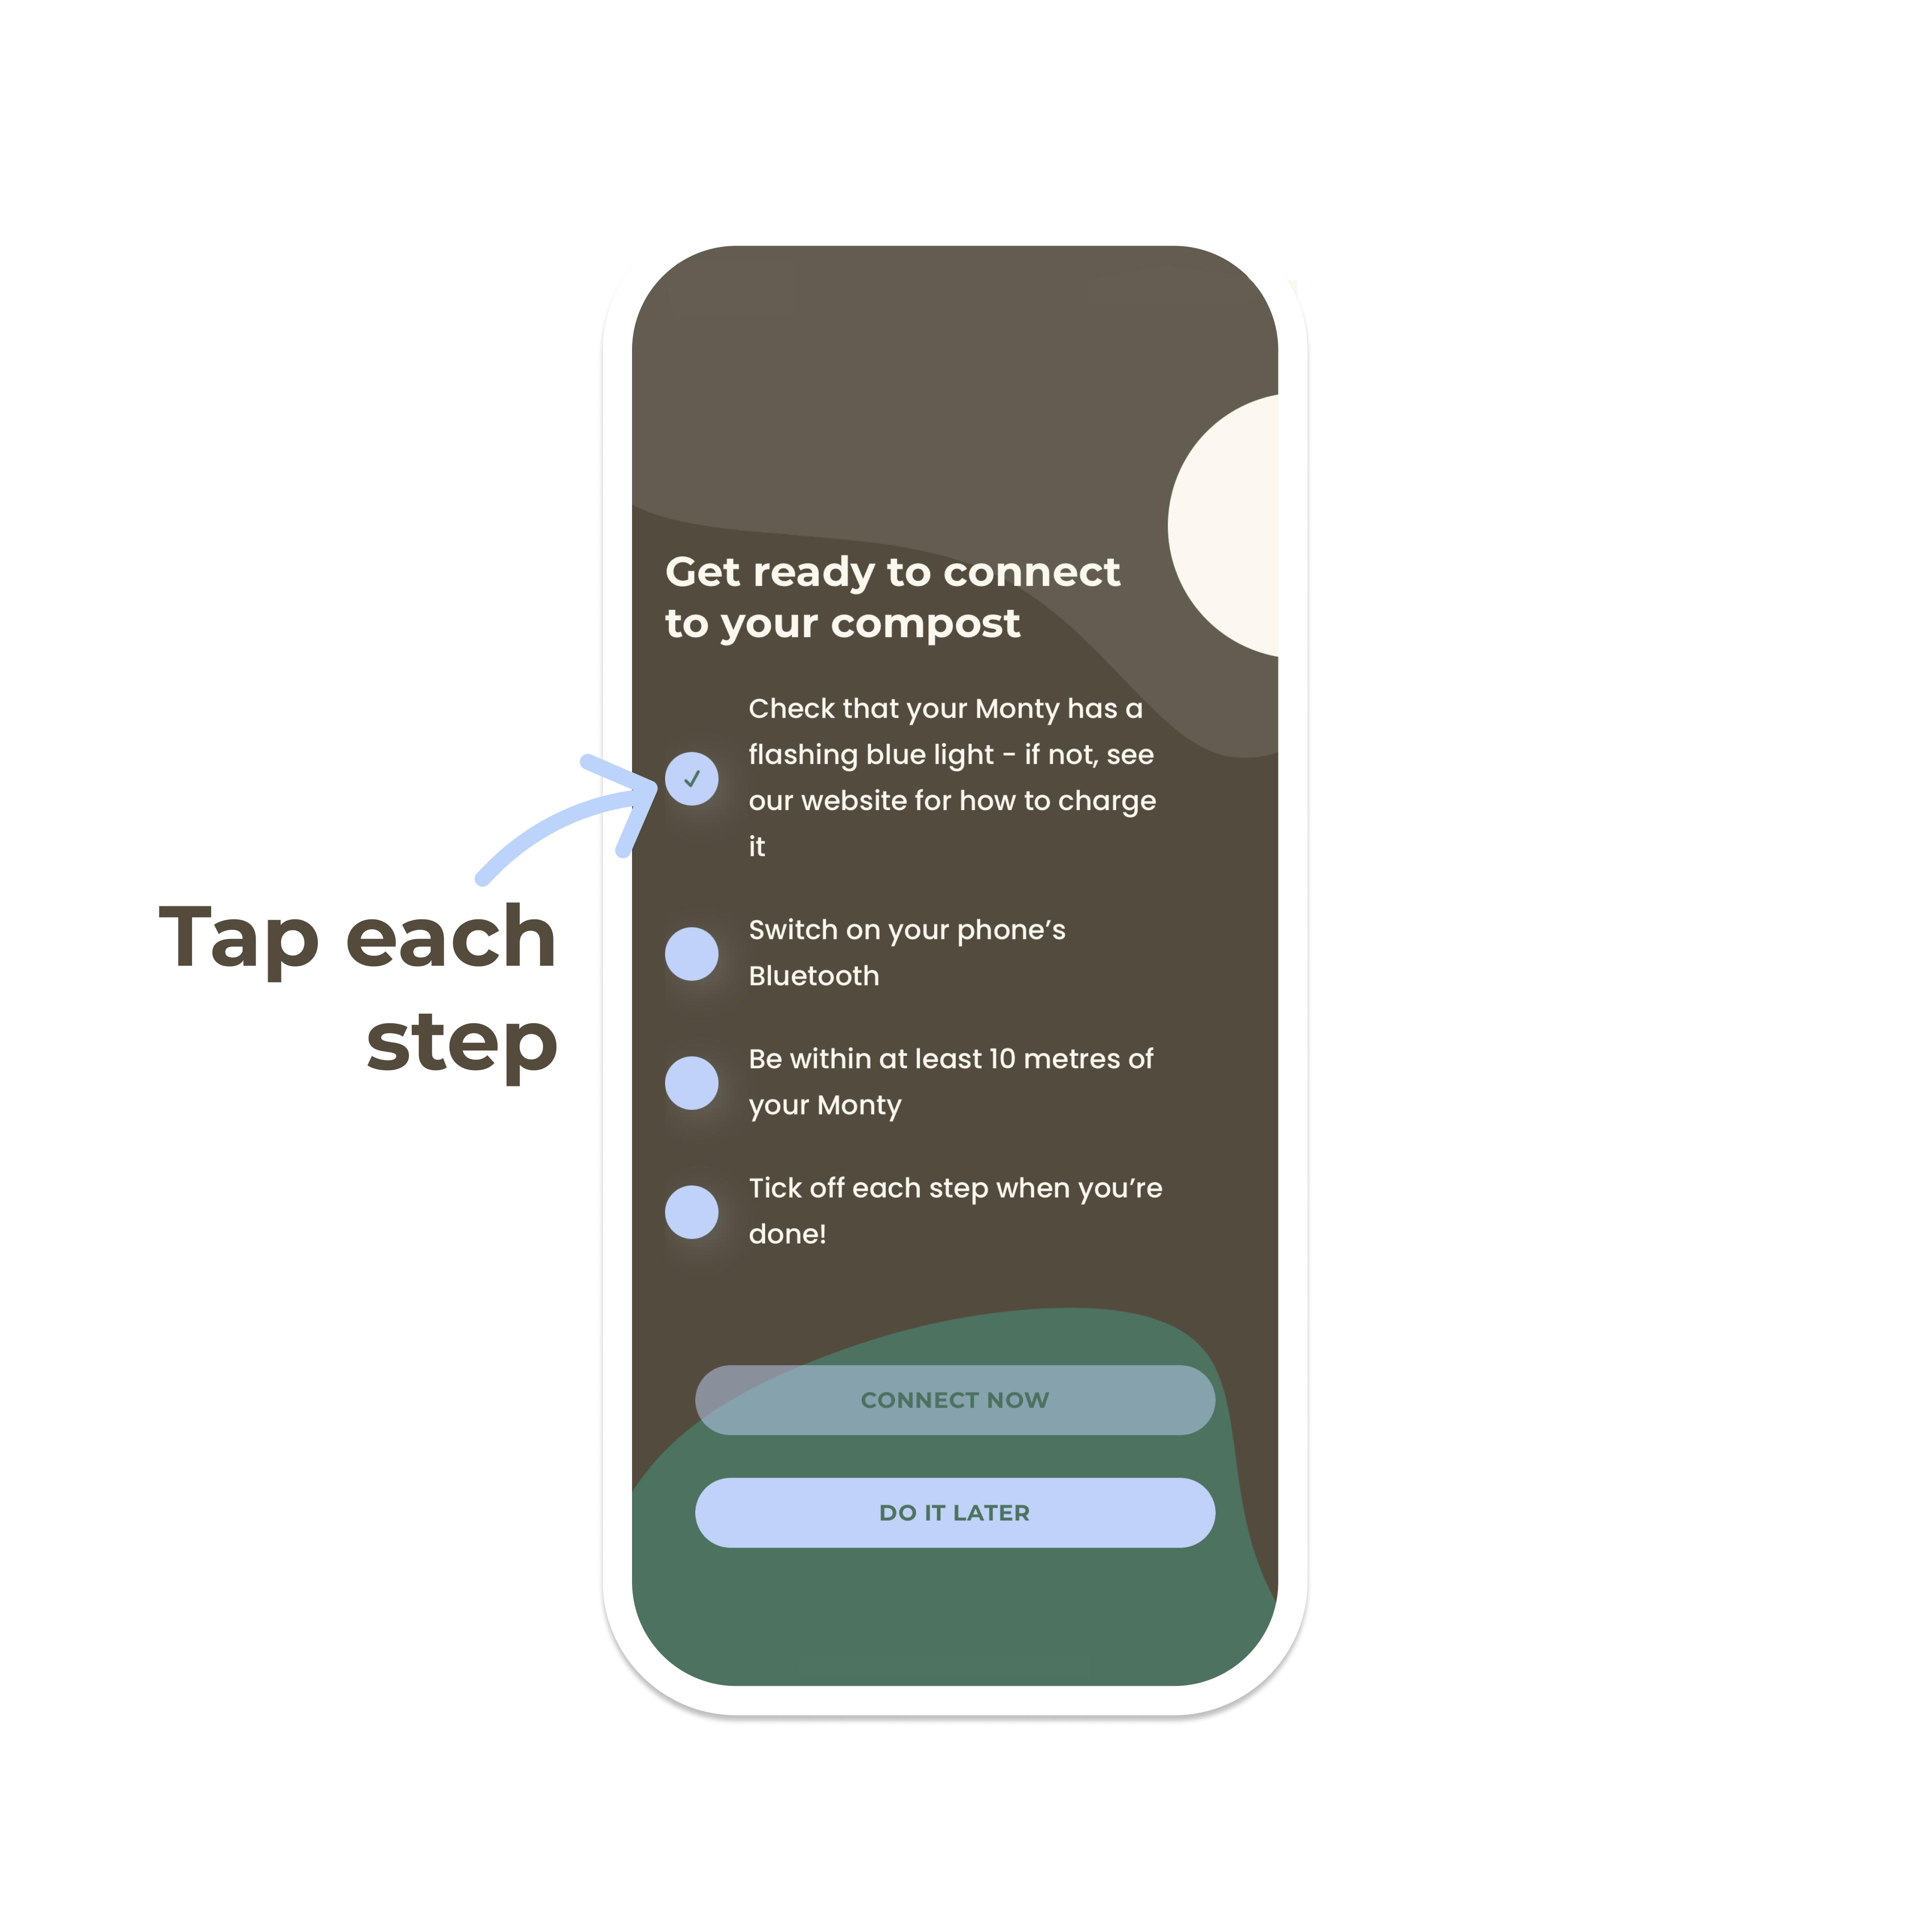
Connecting to Monty Monitor

Tick off each step as you check through the checklist. The 'Connect Now' button will remain greyed out until you've ticked off each step.

Step 10

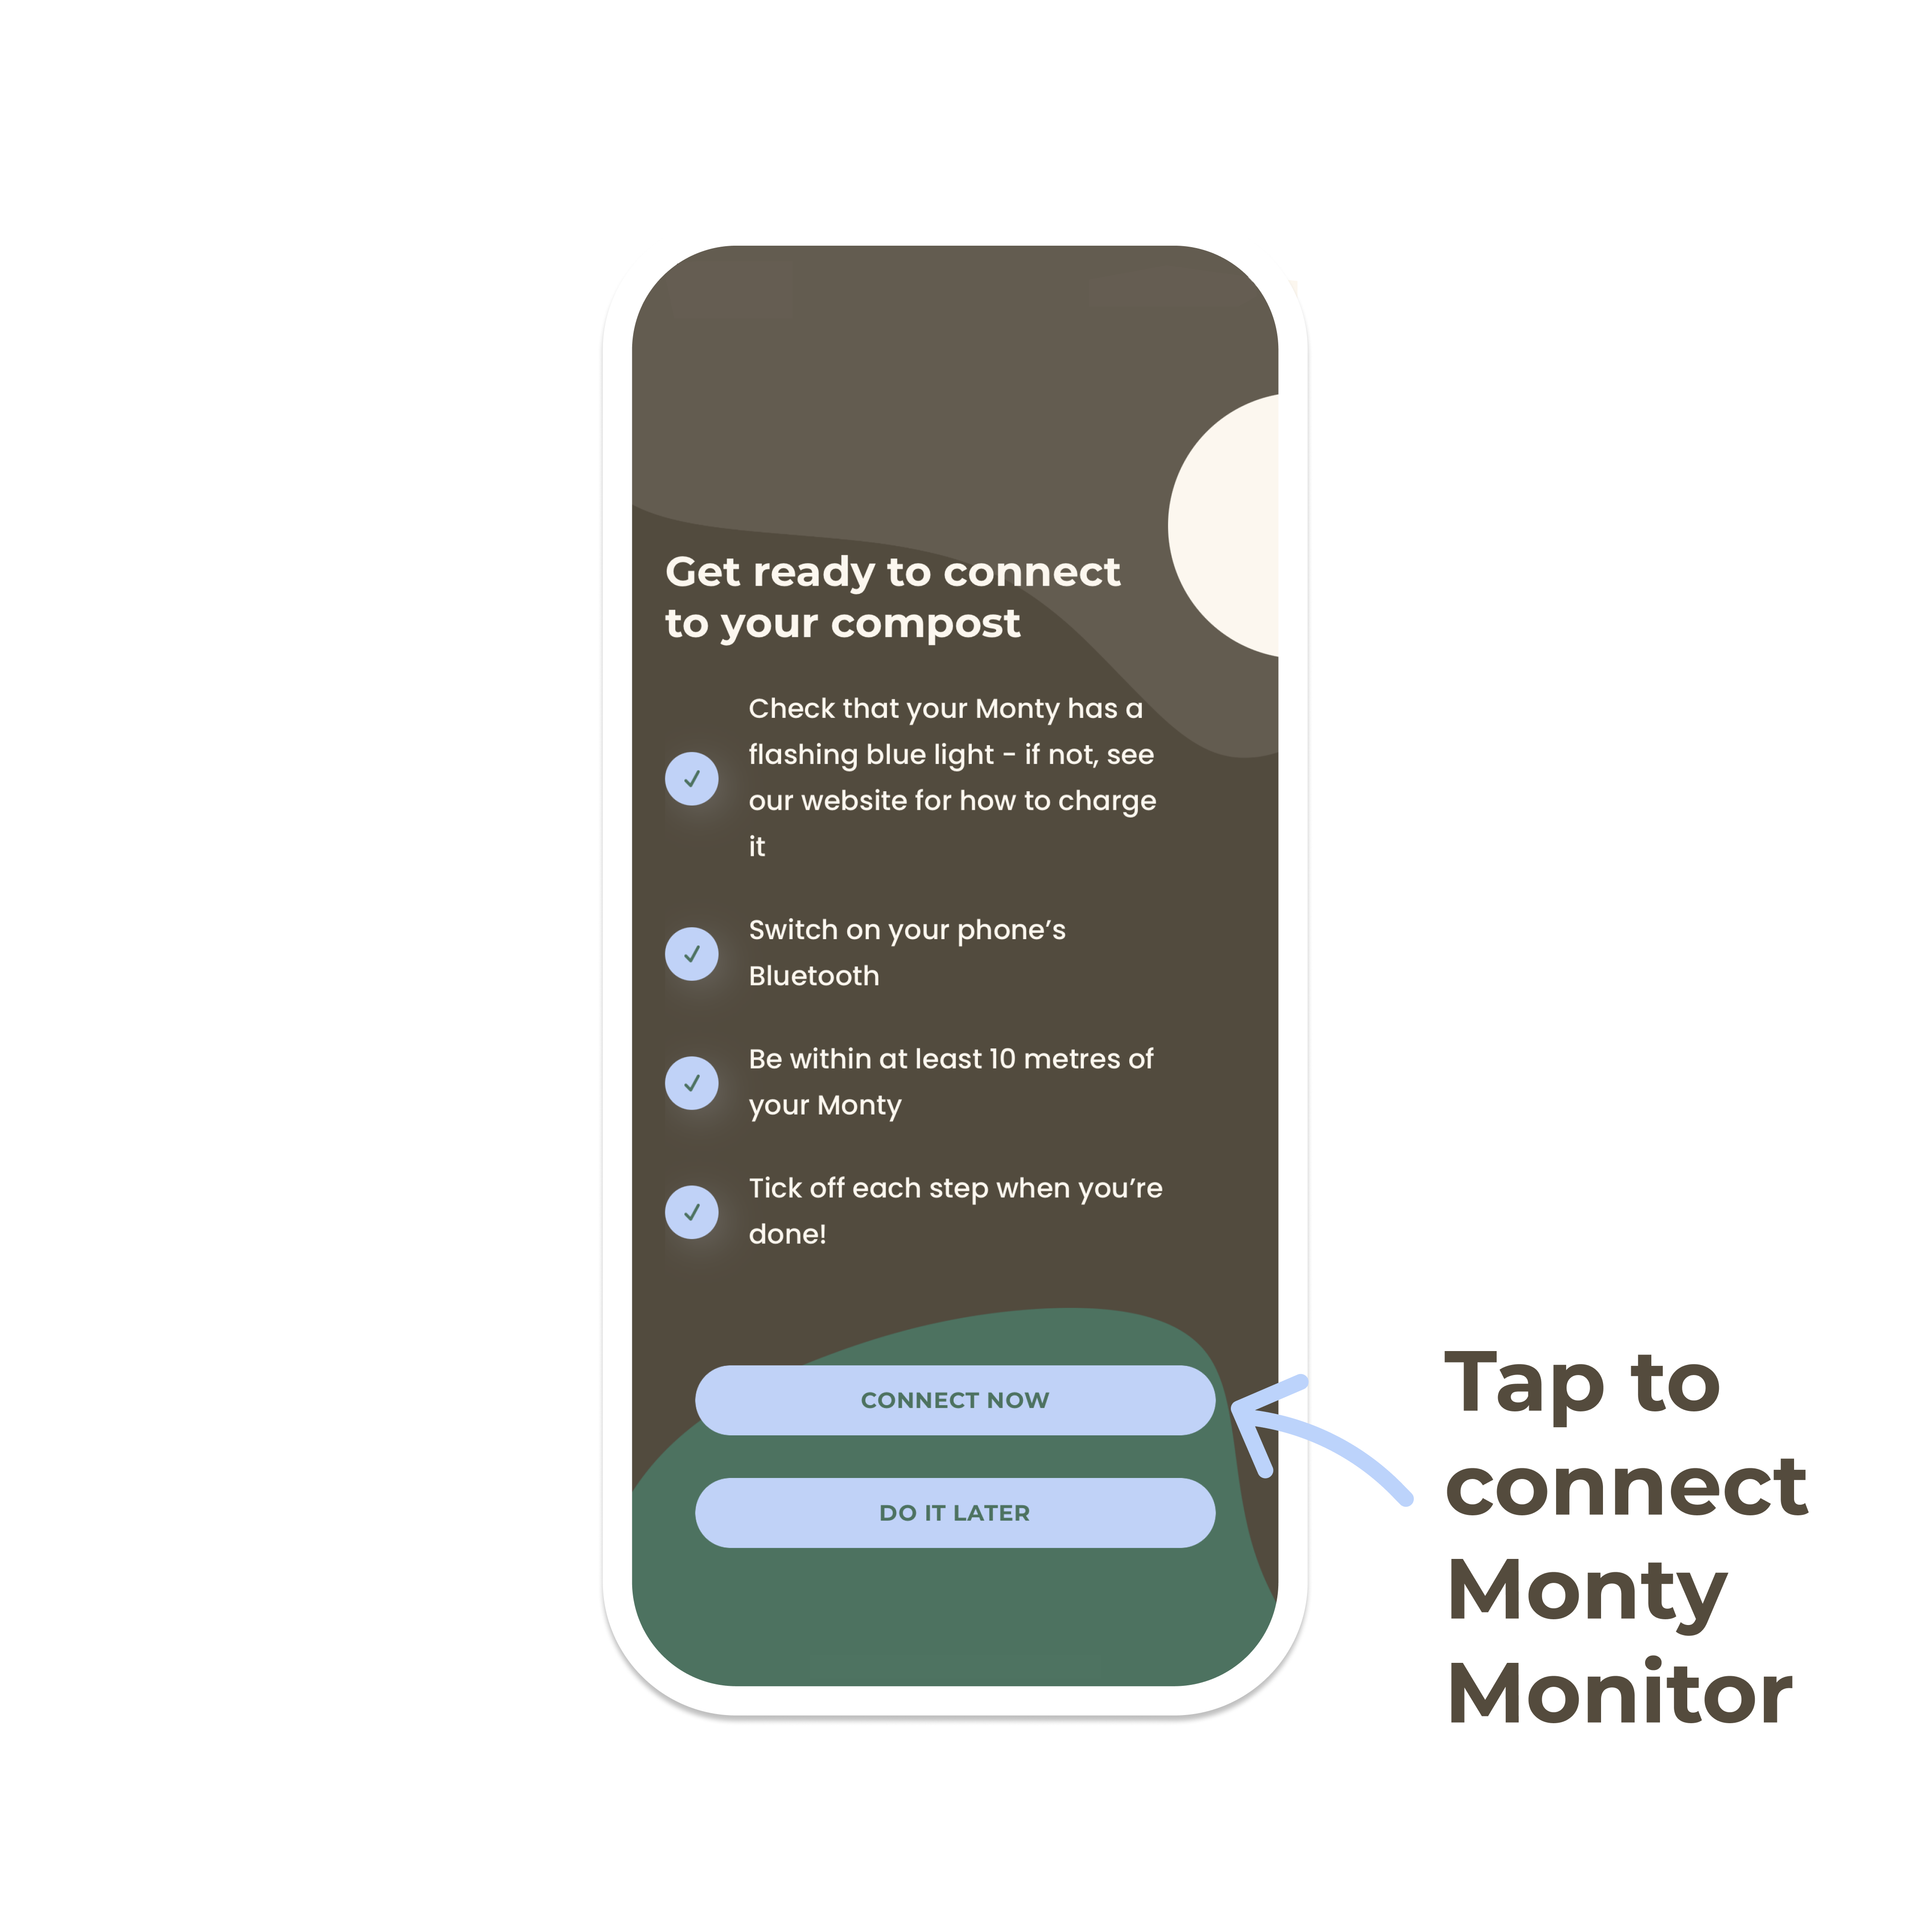
Tap connect now

After completing the checklist, you're ready to tap 'Connect Now' to connect to Monty Monitor.

Step 11

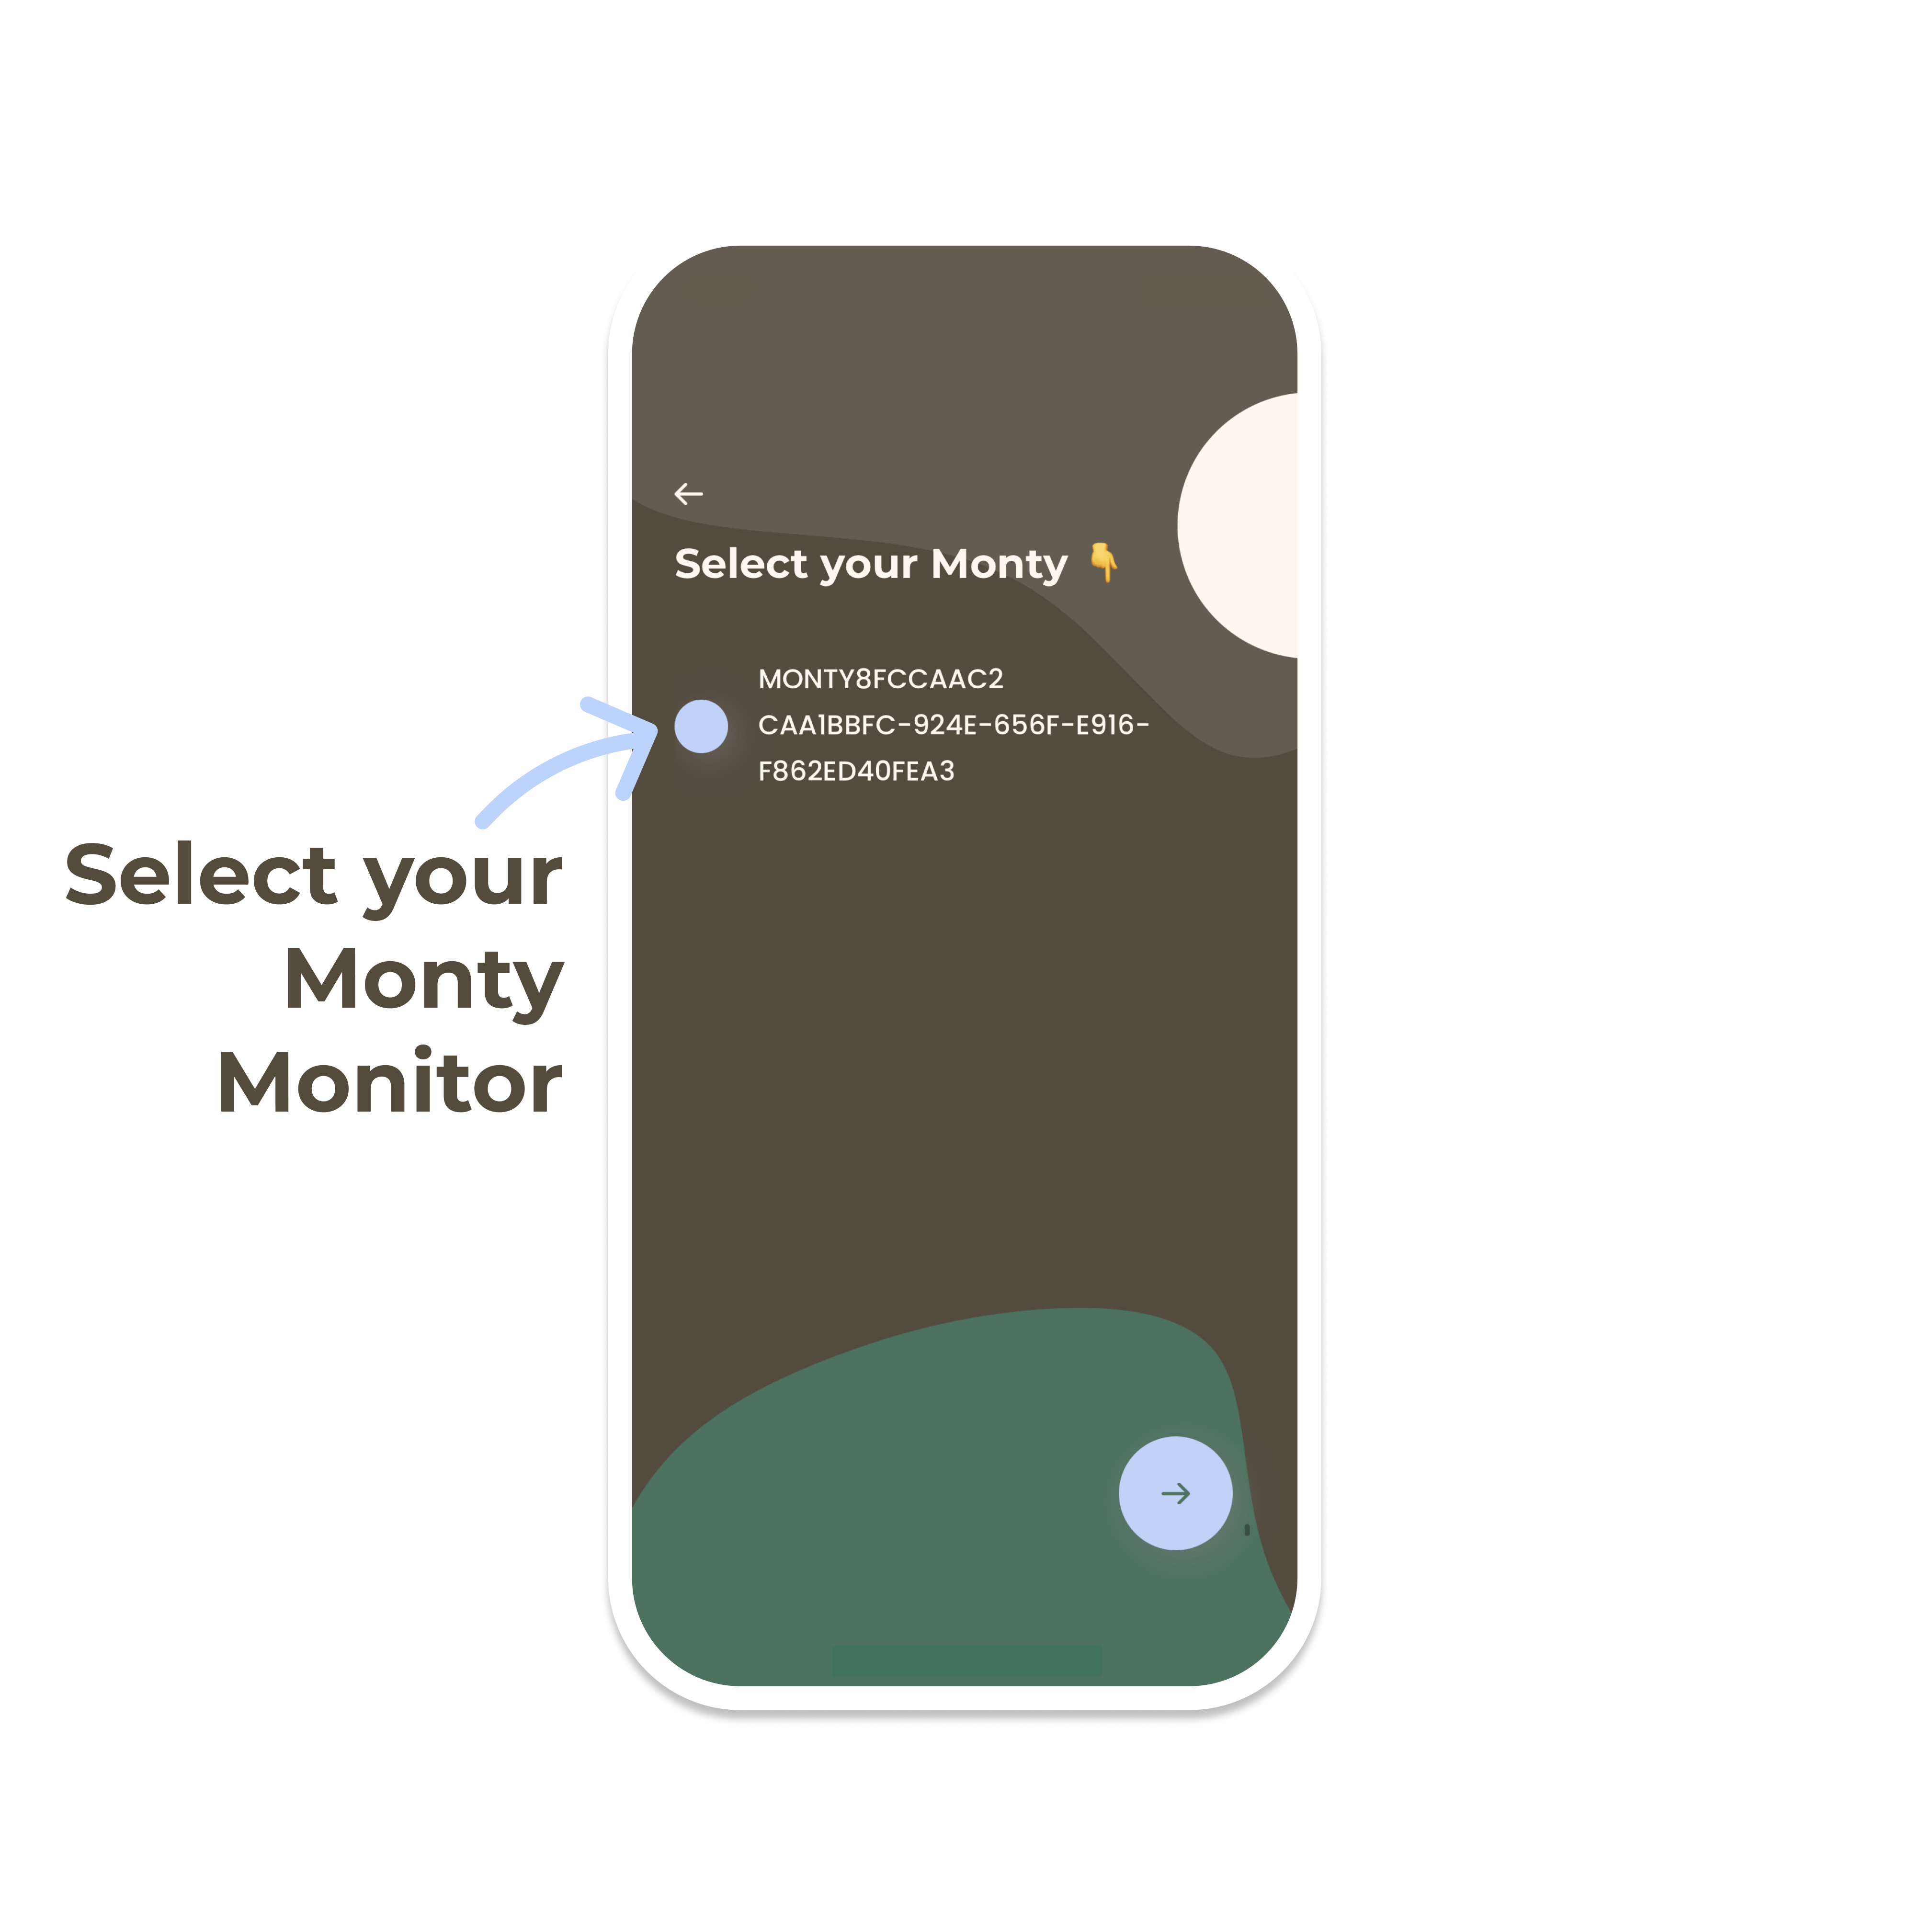
Select your Monty Monitor

Select your Monty Monitor from the screen. This is the beginning of the Monty Monitor connection process. If no Monty Monitor devices are shown, check that Bluetooth is switched on your device.

Step 12

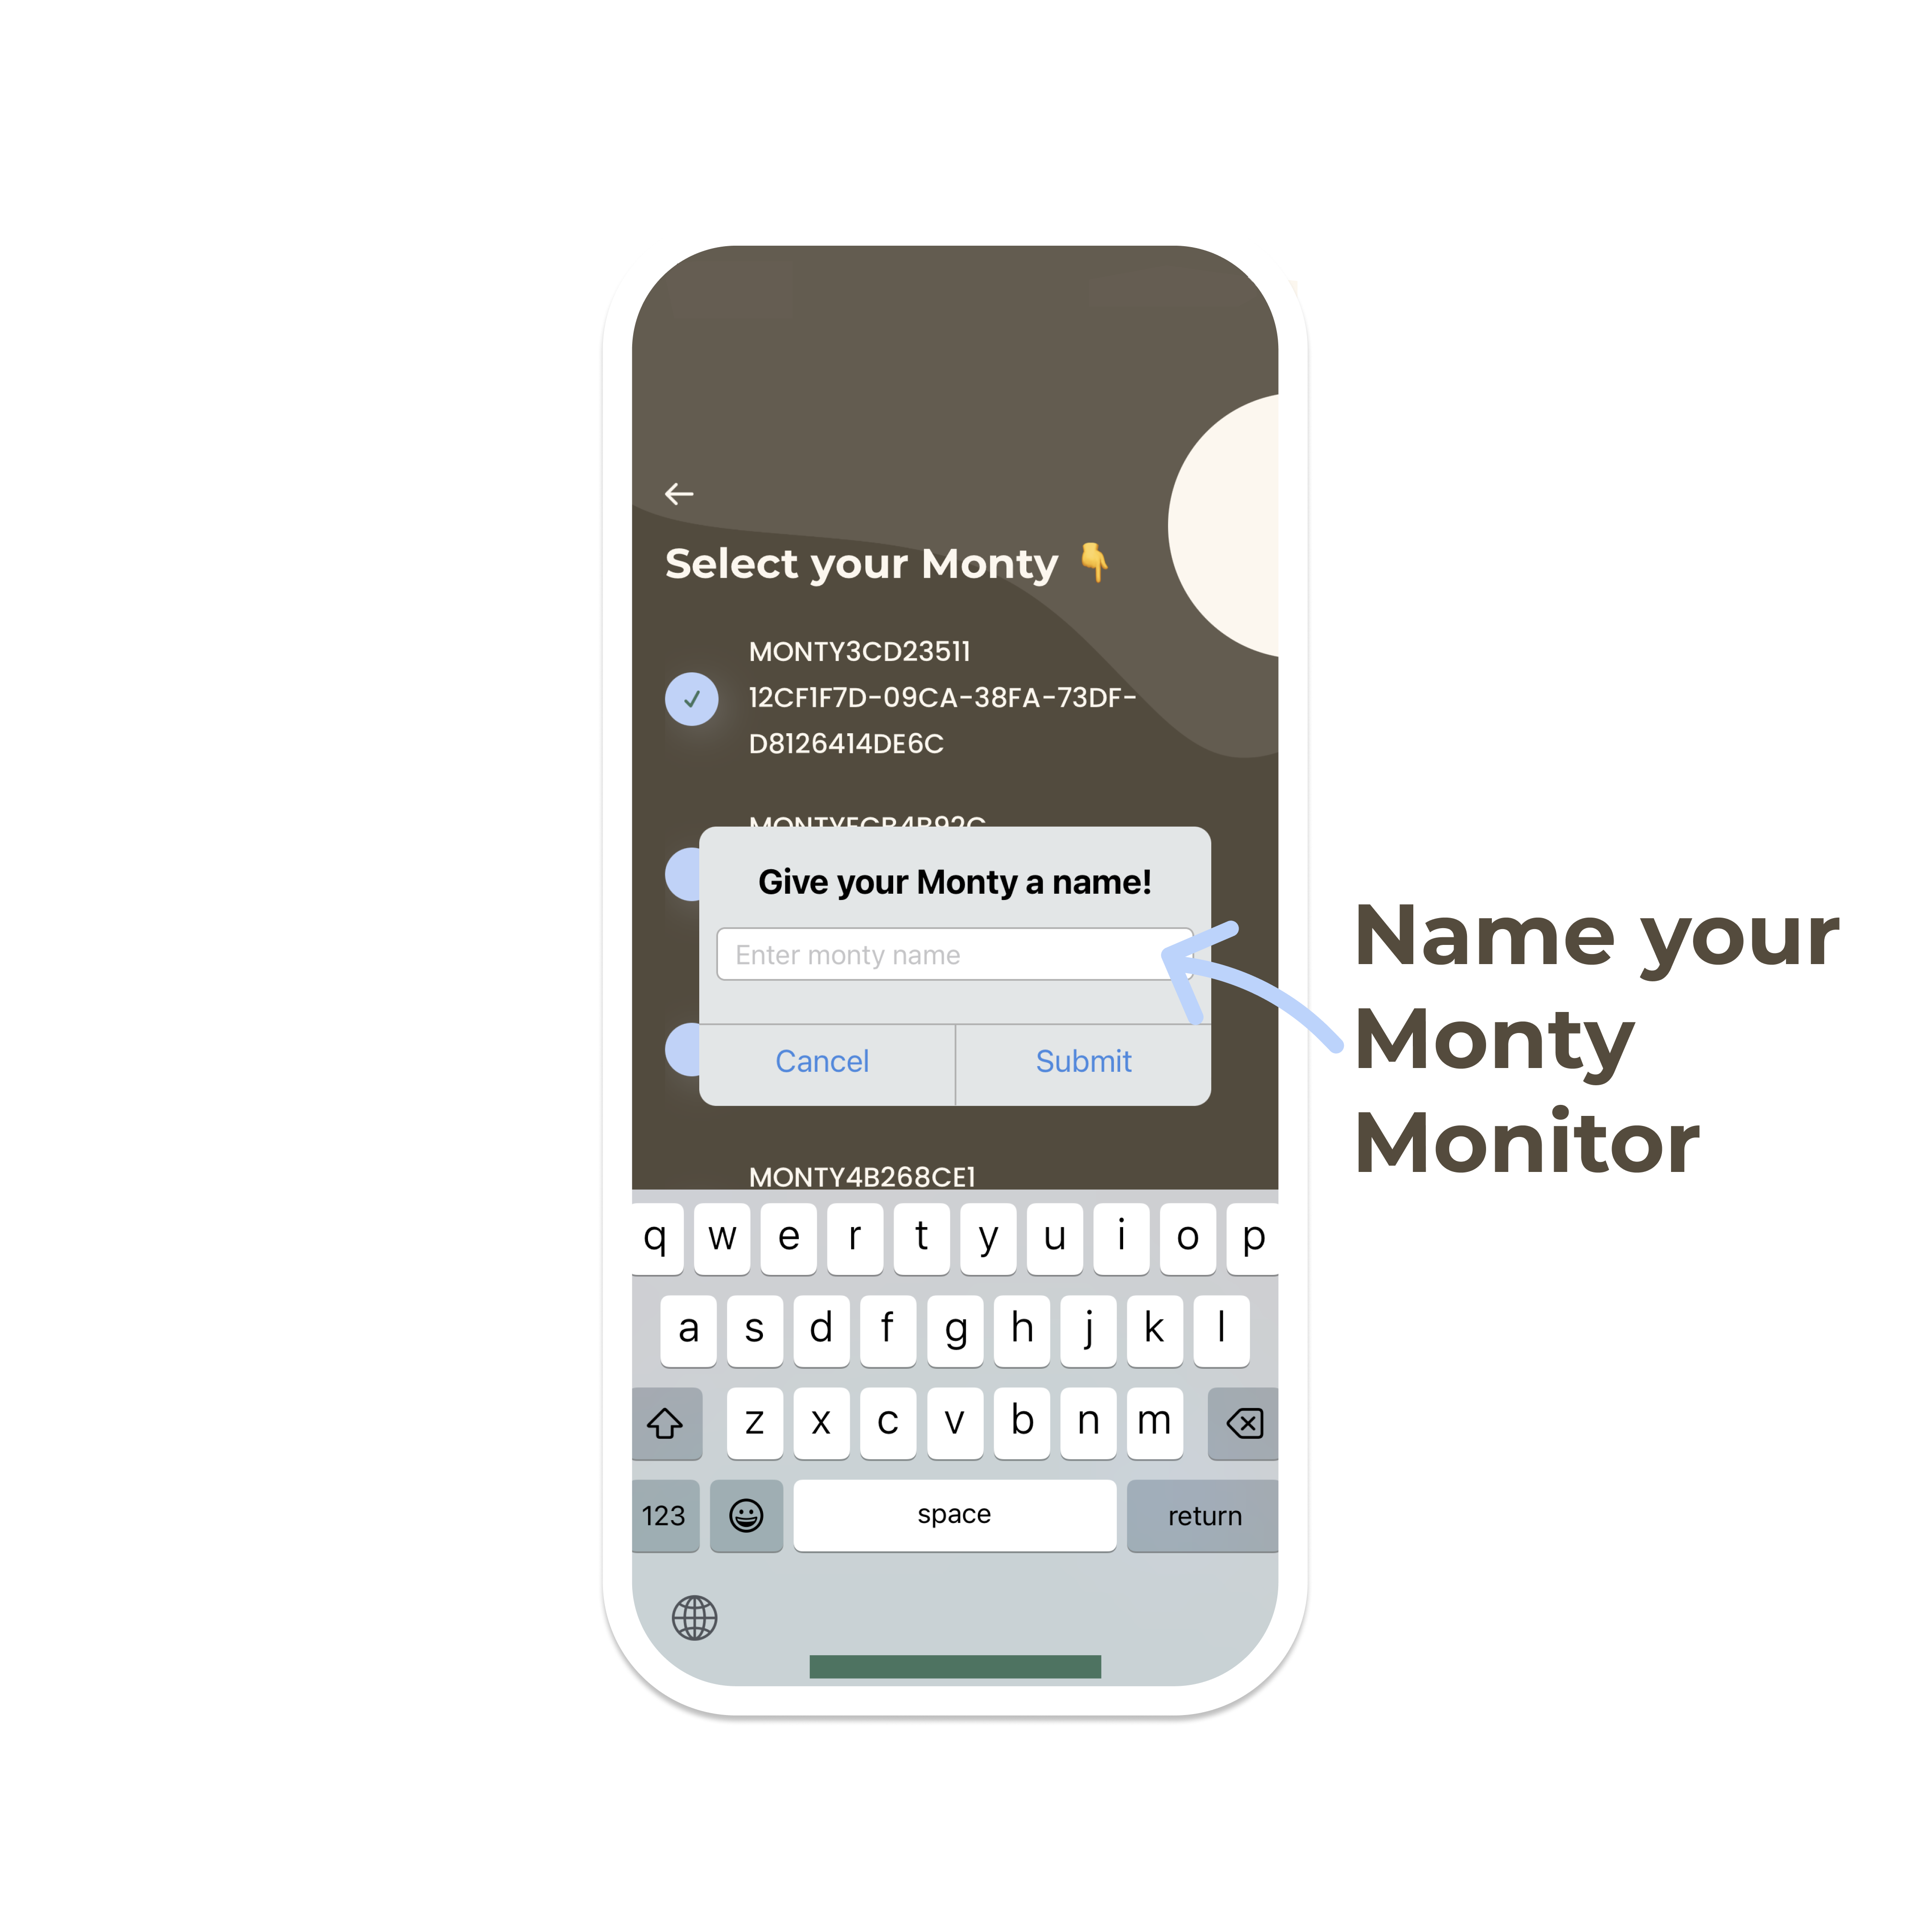
Give Monty Monitor a nickname

Name your Monty Monitor. This helps you tell each monitor apart if have more than one Monty Monitor.

Step 13

Wait for Monty Monitor to sync

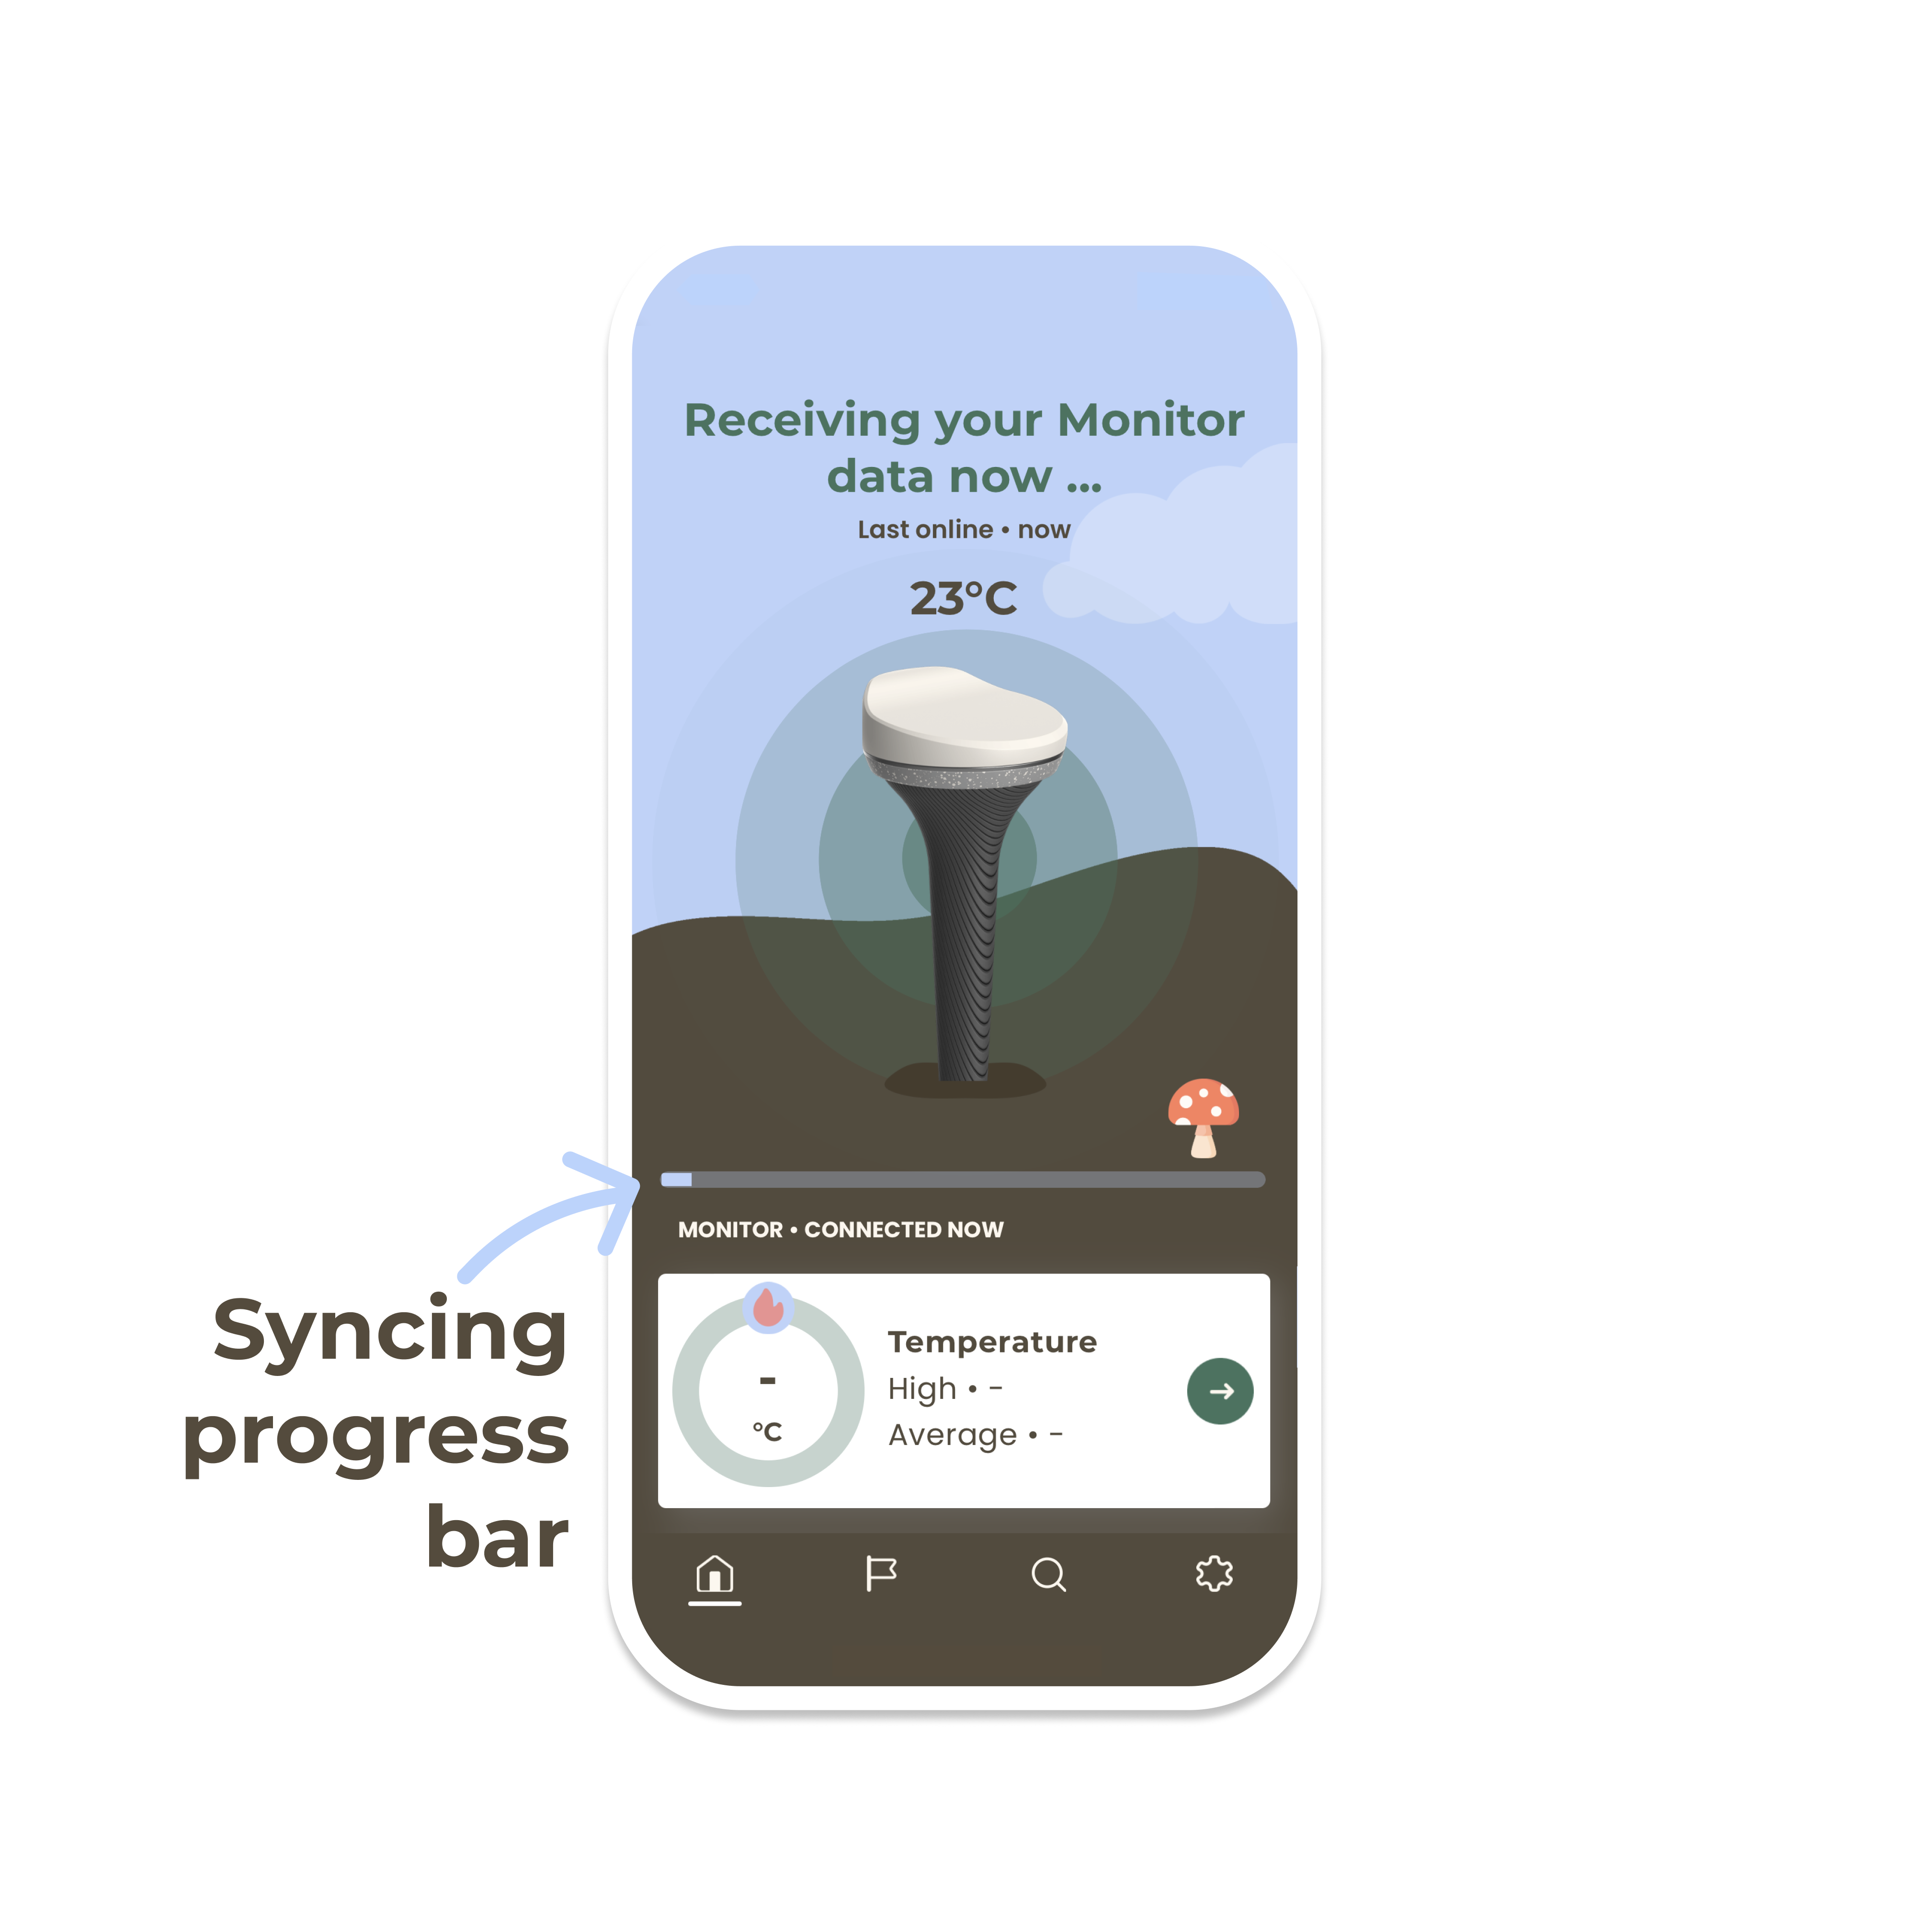
Leave the Monty Mobile app open to allow the sync to complete. The first connection sync may take up to 5 minutes. The blue bar under the Monty Monitor icon will progress as the sync completes.

Future connections to Monty Monitor through Monty Mobile should be completed within a minute.

Step 14

Unbox the Monty Monitor charger

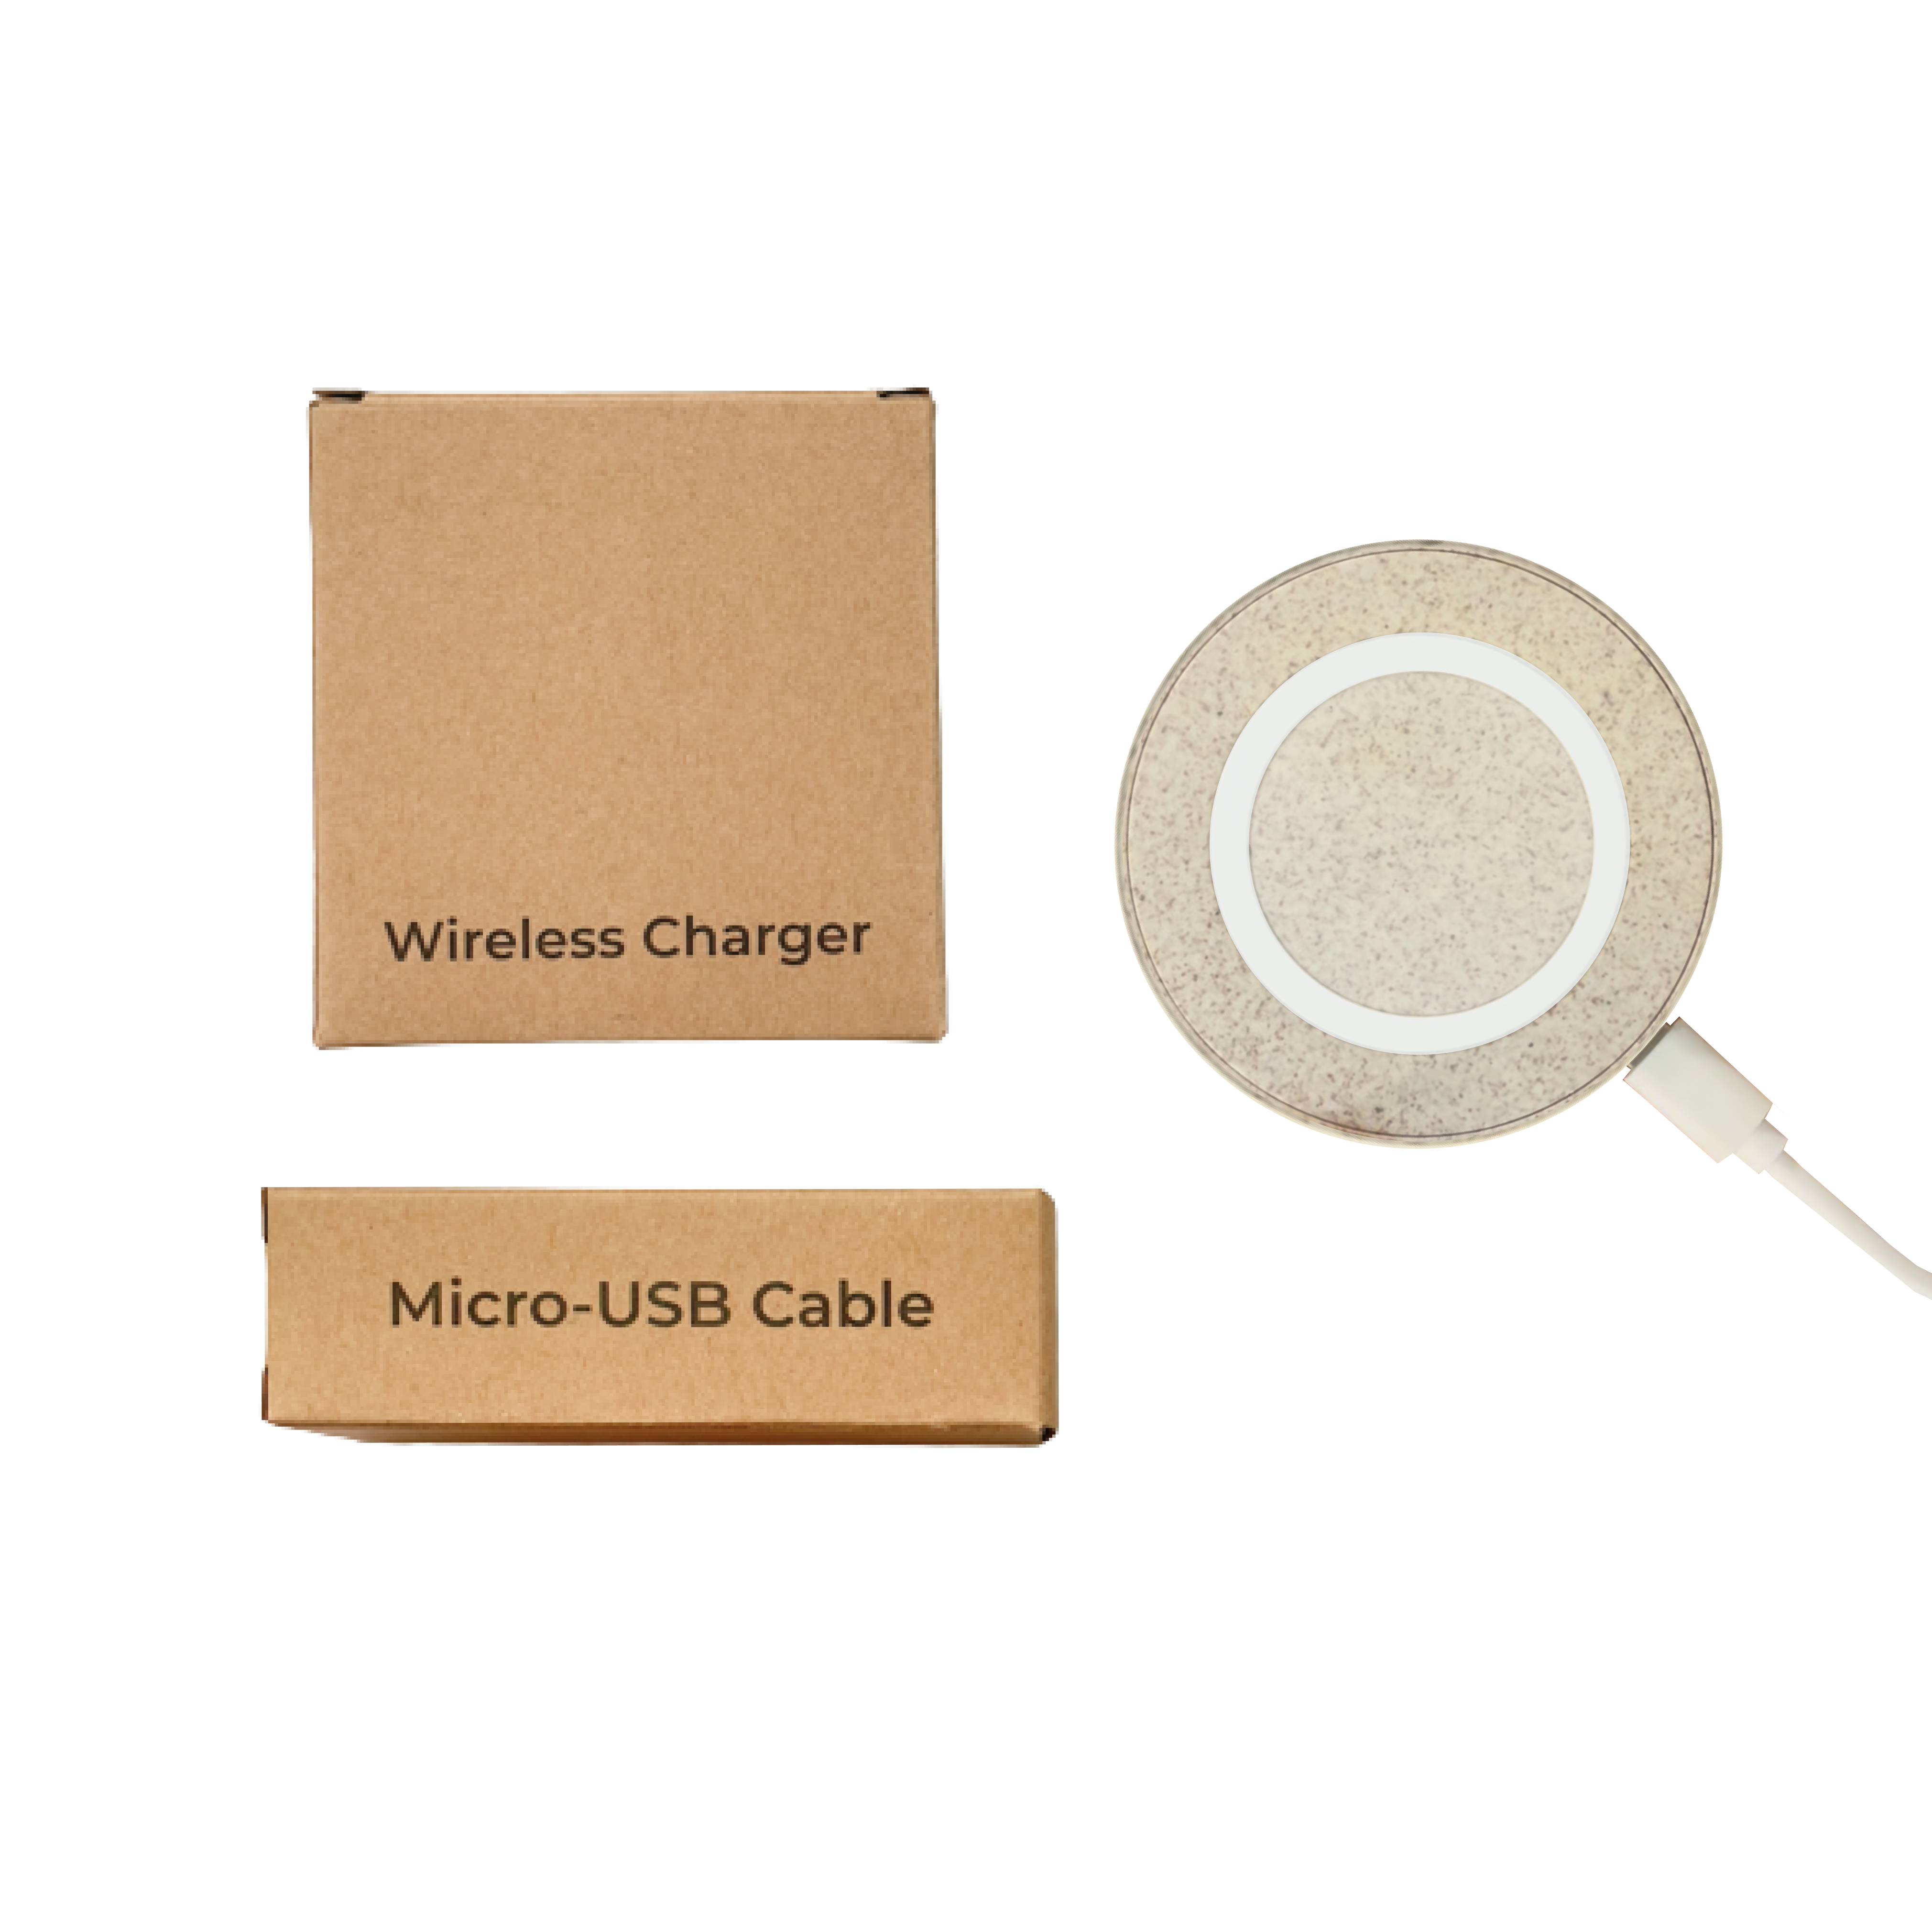
Monty Monitor is charged wirelessly. The wireless charging pad and Micro-USB cable is included and located inside the Monty Monitor box.

Step 15

Connect the charging cable

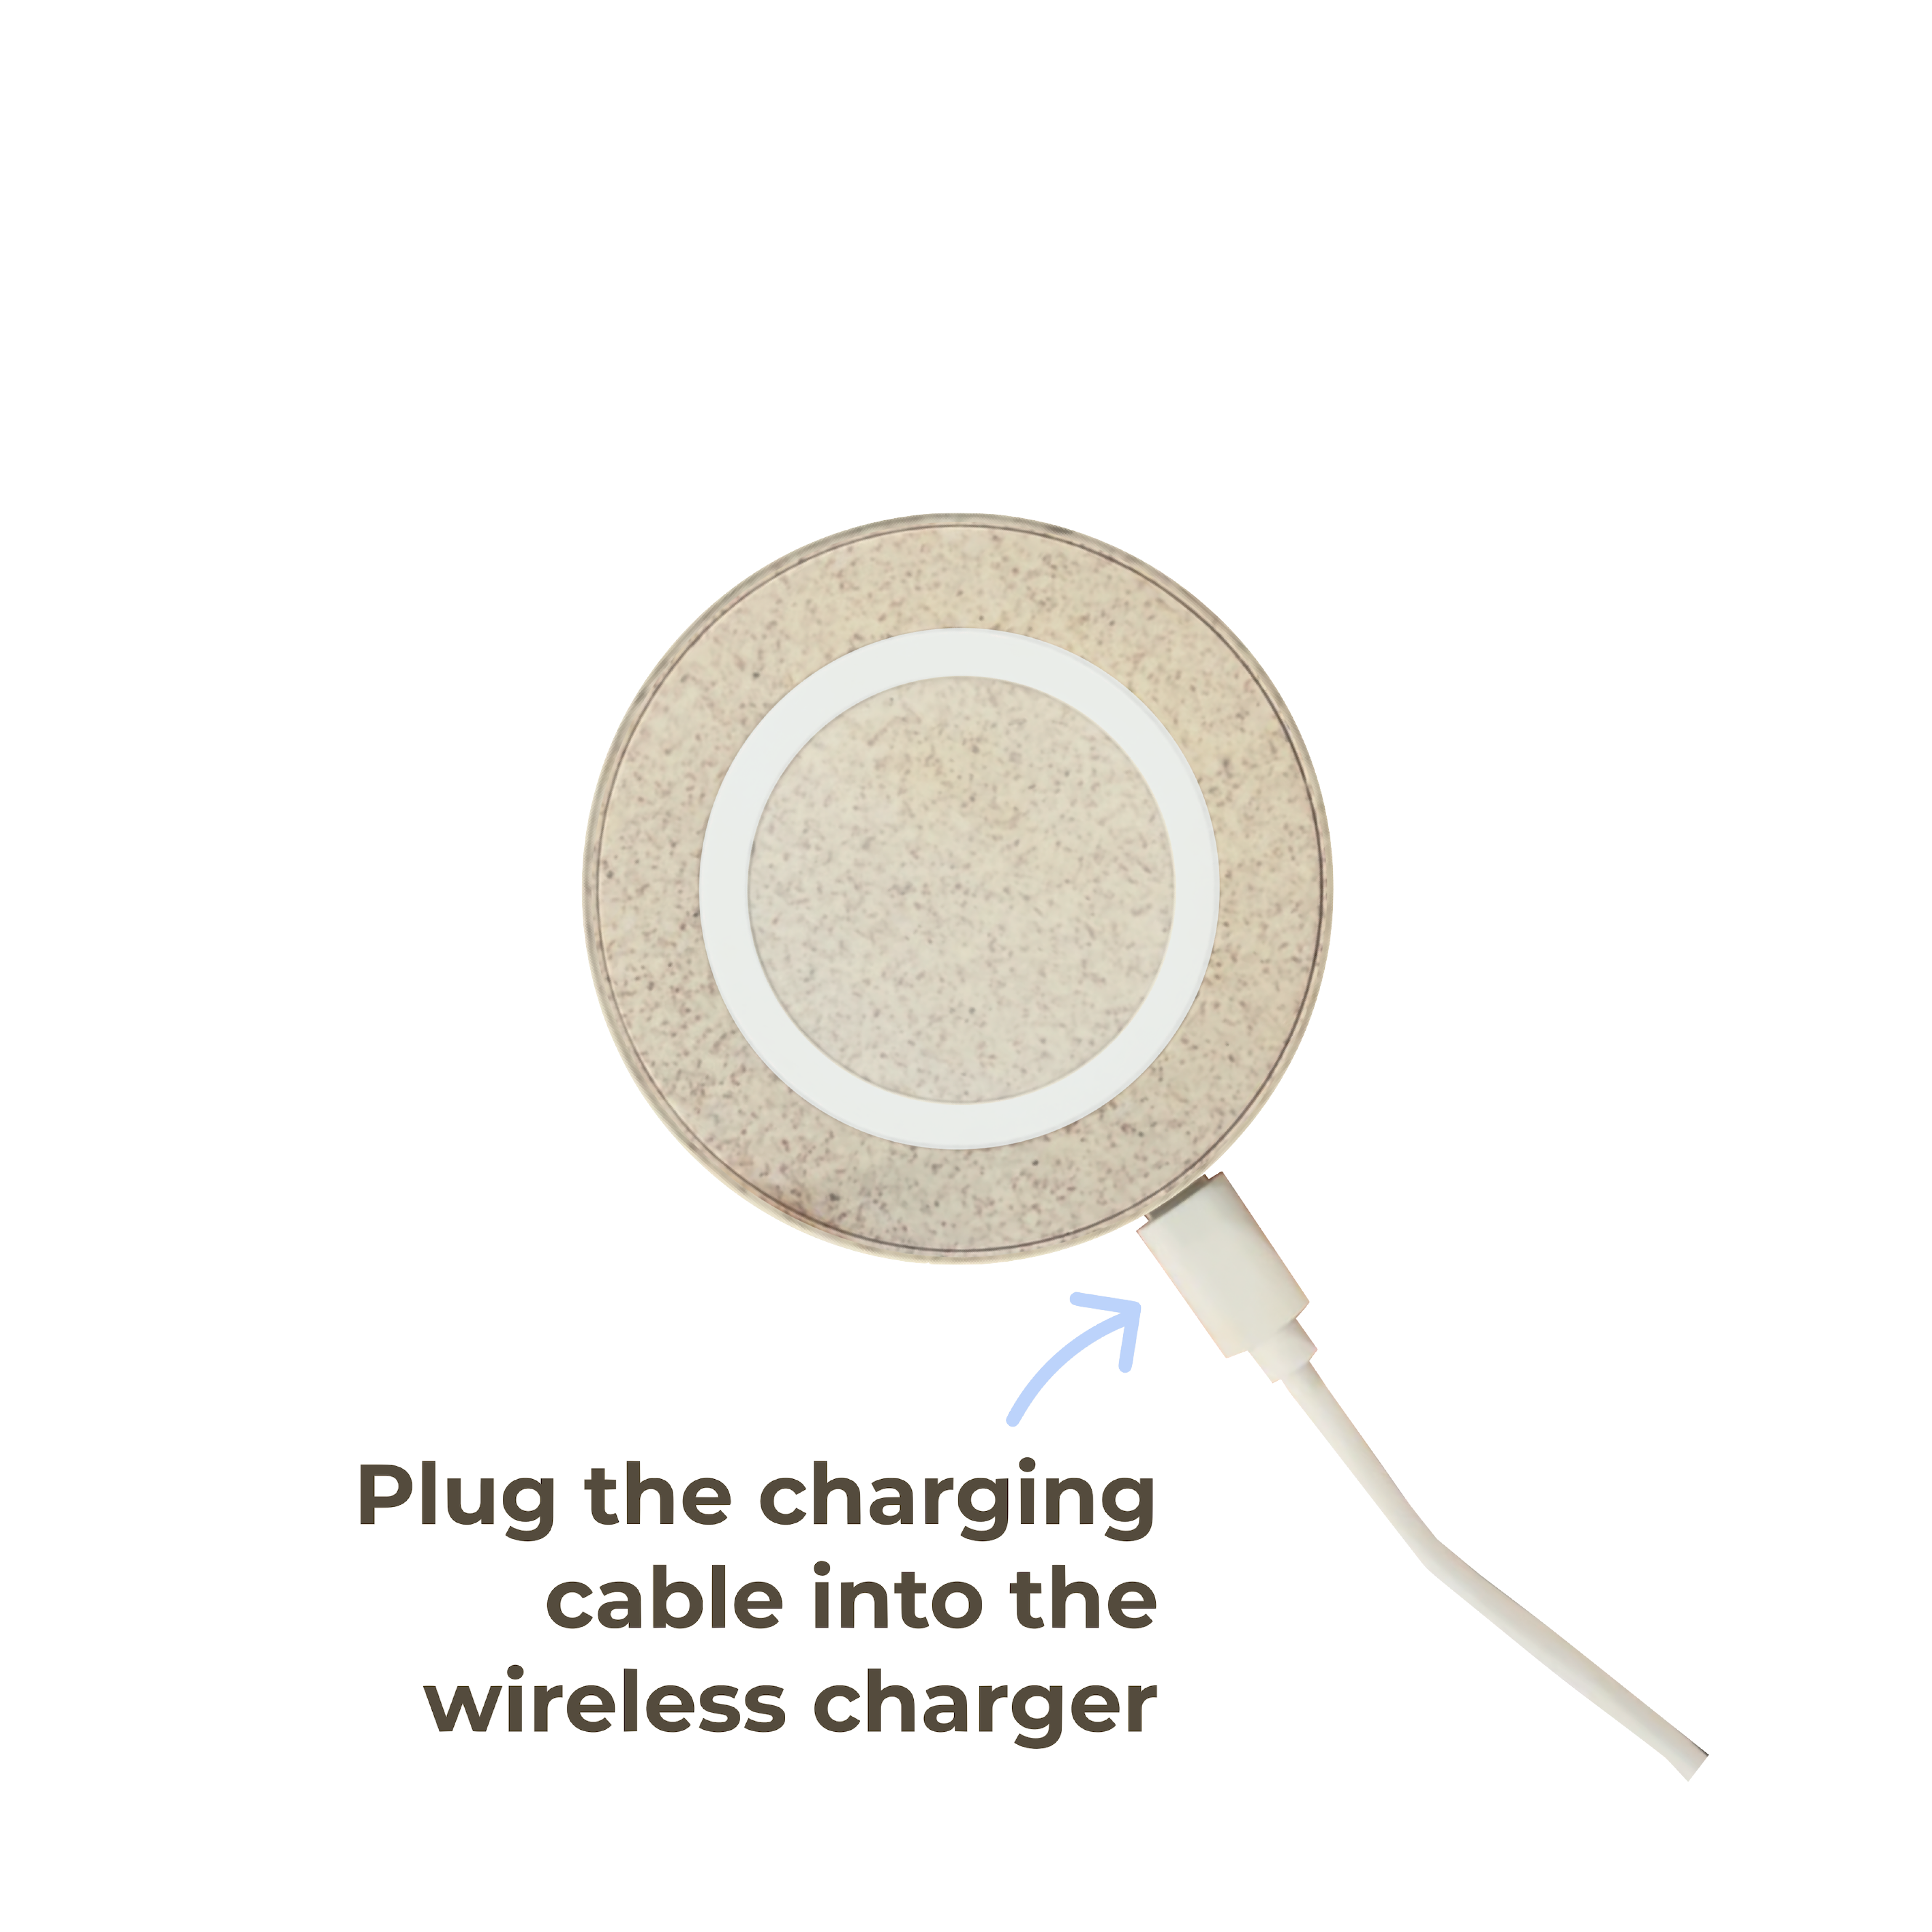
Plug the Micro-USB cable into the wireless charging pad. The charger needs to be placed writing side down.

Step 16

Connect to a wall charger

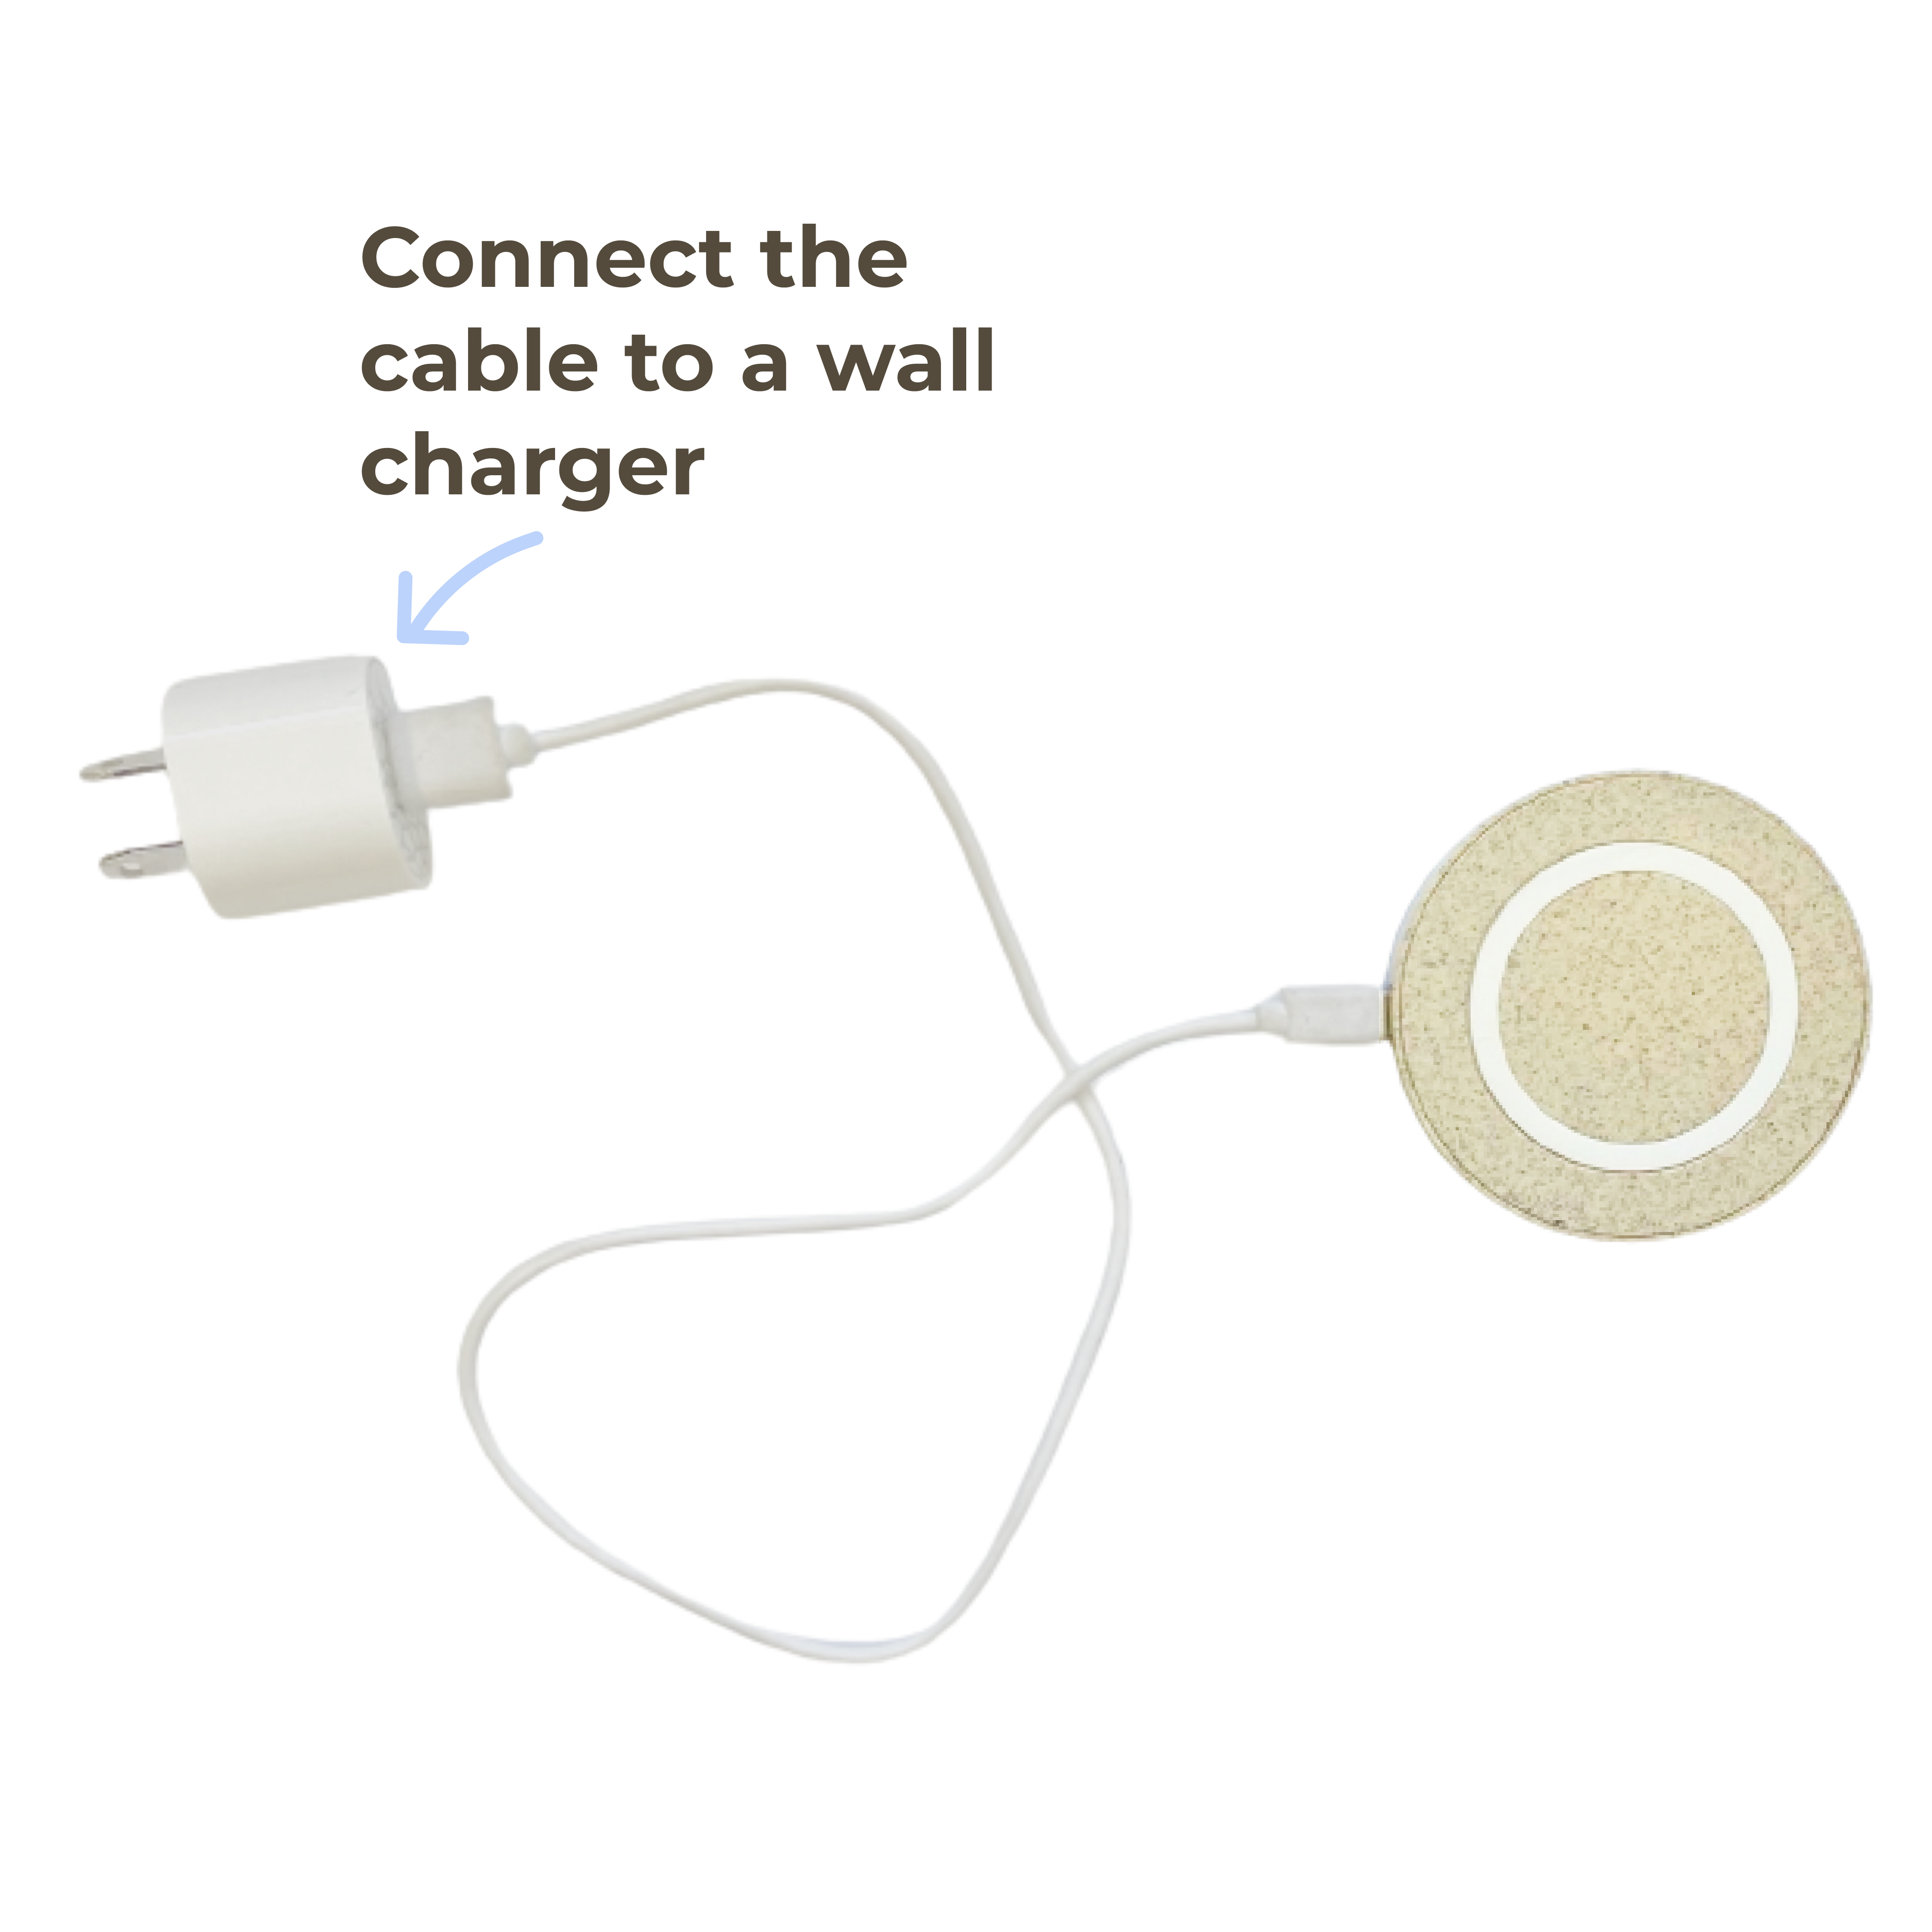
Plug the USB end of the charging cable to a wall adapter and plug it into power.

Step 17

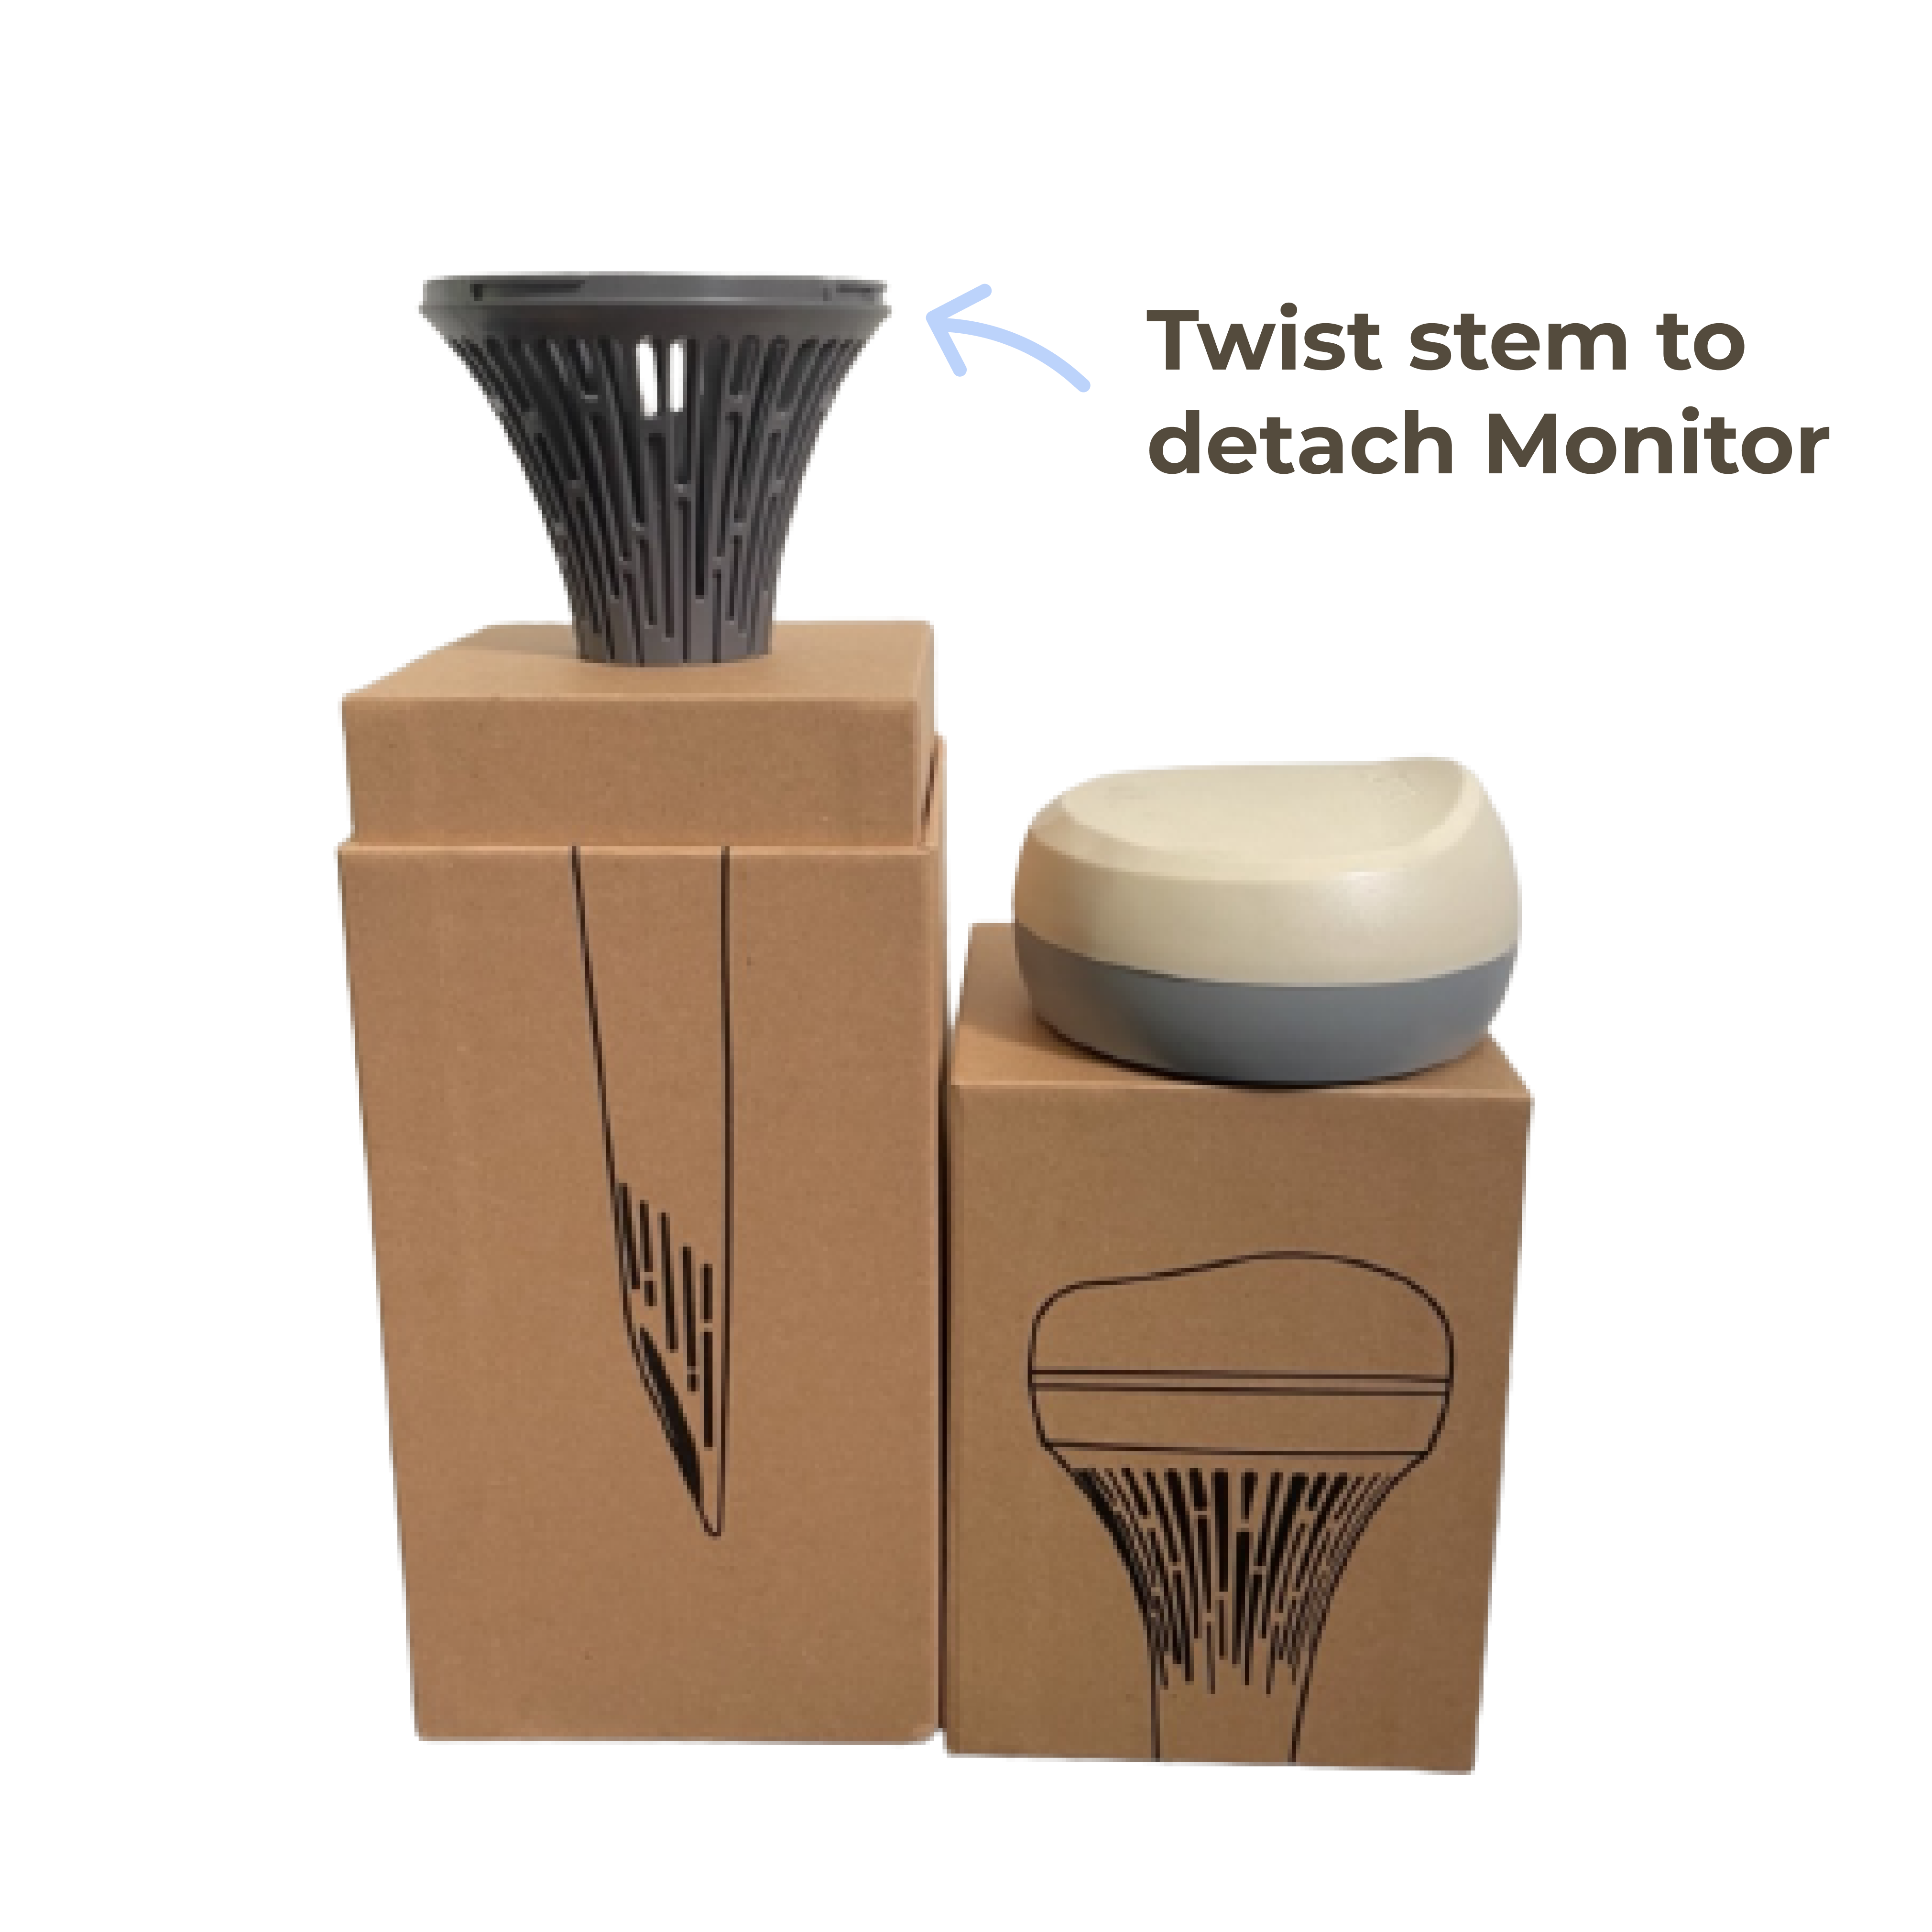
Detach Monty Monitor to charge

Hold the Monty Monitor stem firm in one hand and monitor in another. Twist the stem and monitor away from each other to detach.

Step 18

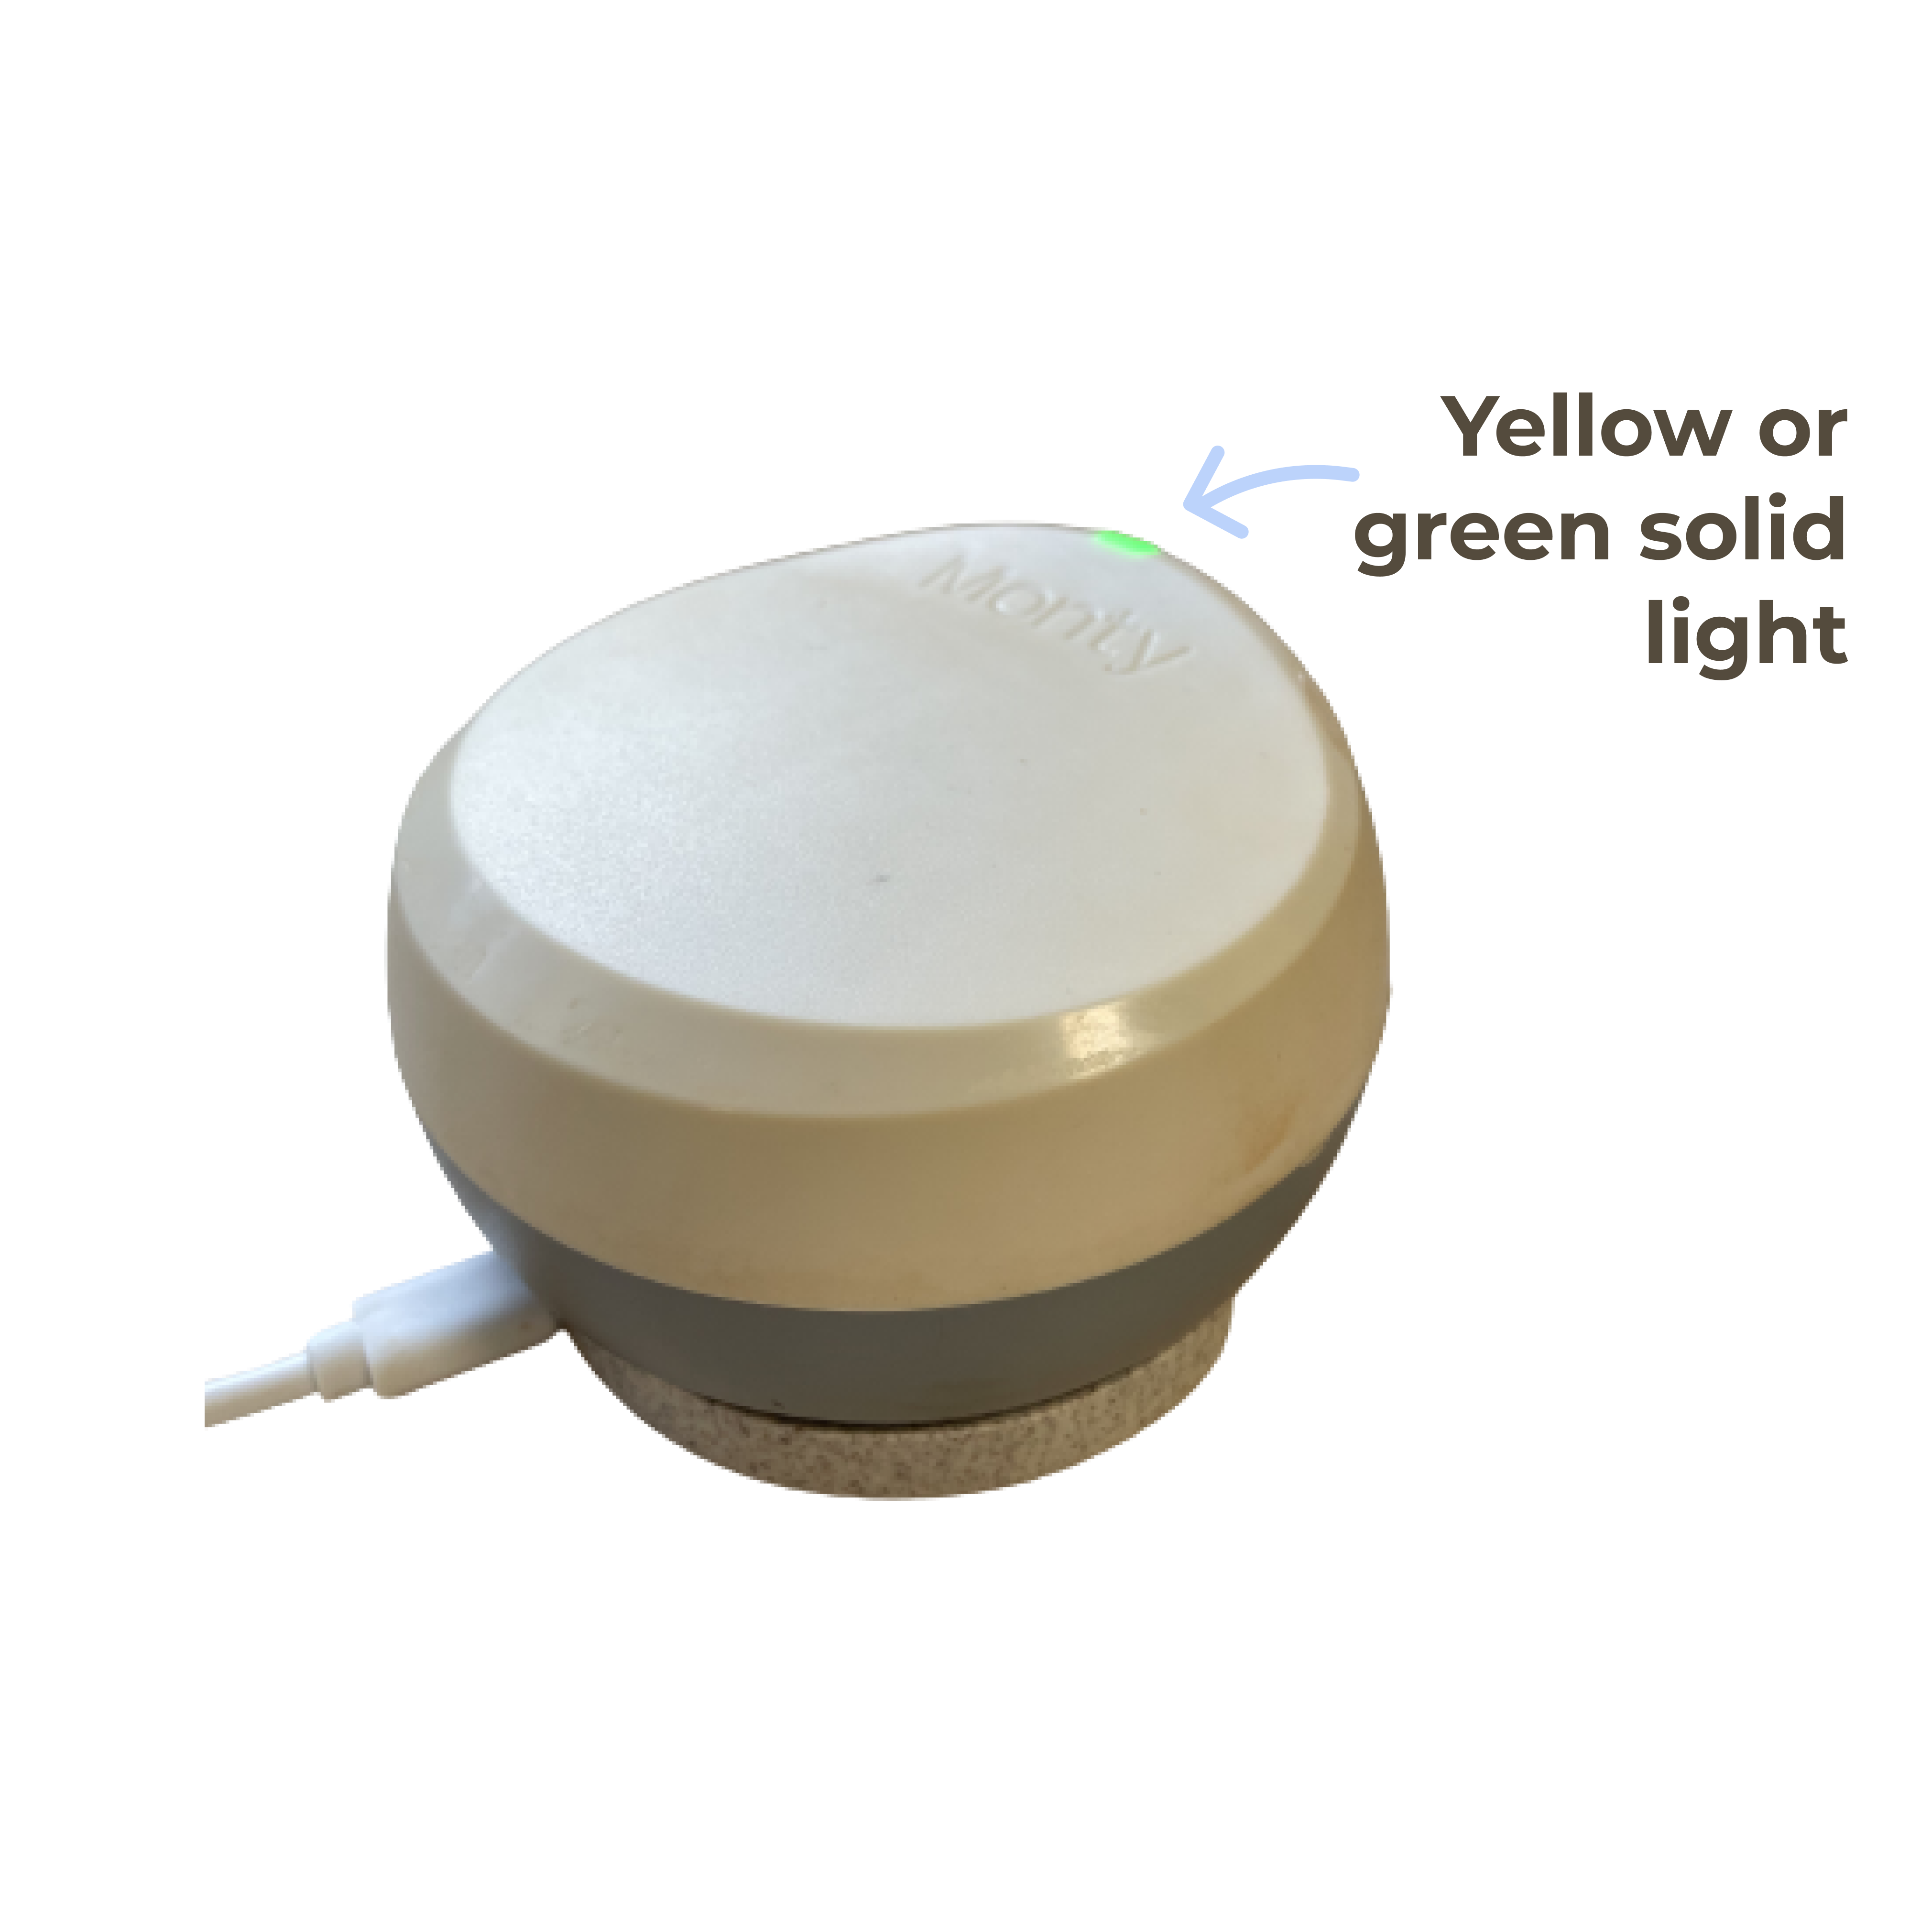
Place Monty Monitor on charge

Remember to have the charger writing side down to charge. Position Monty Monitor on the centre of the charging pad until a solid yellow or green light appears. These lights mean Monty Monitor is in charging mode. The light may switch from solid yellow to solid green, this is to be expected. Leave Monty Monitor on charge for 4-6 hours.

More resources

If you're ever stuck, Monty has you covered. There's a whole library of resources for you to check out!

FAQs

For a quick fix, read through our most frequently asked questions.

Video Tutorials

Follow along a video tutorial on Monty's YouTube channel.

Direct Support

In a sticky situation? Contact our team for direct support.